April 20, 2010

Black & Whites


I don't remember when I tried my first Black and White cookie, but I know that they now rank solidly in my top five all-time favorite cookies. All-time is big. It's like making it to the top 10 on American Idol or to the all-star team of whatever sport you're good at.

Black & White cookies can be found in almost every bodega and bakery in the city. The commercially made versions are tightly wrapped in cellophane and slightly smaller than the size of a salad plate. I'm not exaggerating when I say they are huge. These cookies are perfect for sharing because they are so big you would feel like a glutton if you ate a whole one. And you'd be on a sugar high for days. Store bought Black & Whites are iced with a layer of smooth white icing on one half and chocolate fondant on the opposite side. Which side to eat first if a hotly debated topic. My advice is to go with your gut instinct and you can't go wrong.

I found this recipe in one of my go-to cookie books, Got Milk? The Cookie Book by Peggy Cullen. I think it's a winner. Try making mini Black & Whites by simply reducing the amount of batter you spoon onto the baking sheets. You'll have more to ice, but the small cookies will look great if you're making a variety of cookies for a dessert platter.

This cookie requires a trip to the store to pick up a few things you probably don't have in your pantry.

1. Parchment Paper (a must here to keep the cookies from spreading too much or sticking to the baking sheets).

2. Cake flour (usually comes in a box). Do not buy self-rising cake flour.

3. Whole milk and bittersweet chocolate. I used a bar of Ghiradelli bittersweet chocolate.

Ready, set, bake!

Black & Whites

1 stick softened, unsalted butter
3/4 cup sugar
1 teaspoon vanilla extract
2 large eggs, room temperature
2 large egg yolks, room temperature
1 teaspoon milk
1 cup plus 2 tablespoons cake flour
1/2 cup all purpose flour
1 teaspoon baking powder
1/4 teaspoon salt

Icing

2 ounces bittersweet chocolate
2 3/4 cups confectioners' sugar
5 tablespoons boiling water
1/2 teaspoon vanilla extract

Preheat oven to 350 degrees. Line two baking sheets with parchment paper.

In a small bowl, sift the cake flour, all-purpose flour, baking powder and salt. Whisk to combine. Set aside.

In a mixer fitted with paddle attachment or in a medium bowl with a hand-held mixer, beat butter, sugar, and vanilla until light and fluffy. Scrape bowl using a rubber spatula. Beat in the eggs and egg yolks one at a time. Scrape down the sides of the bowl again with spatula. Add the milk.

On low speed, add the dry ingredients and mix until just combined. Scrape down the sides of the bowl with spatula and mix again for just a few seconds.

Scoop the batter onto prepared baking sheets using an ice cream scoop, leveling it off across the top before dropping onto sheets about 2 1/2 inches apart. Do not crowd the mounds of batter on the sheets. Bake one tray at a time for 15 minutes, or until the centers spring back lightly when touched. Do not allow cookies to brown.

Let sit for five minutes and then transfer to wire racks to cool completely. Do not overbake.

Icing Instructions

Melt the chocolate in a double boiler or in the microware, being careful not to burn or allow any water to come in contact with the chocolate or it will seize.

In a medium bowl, use a whisk to combine confectioners' sugar and boiling water. Add the vanilla. The consistency should be slightly runny, but thick enough to spread. Add more water to thin if necessary or more sugar to thicken it. Using an offset spatula or butter knife, spread half of the flat side of each cookie with icing.

When all cookies are iced with white frosting, add melted chocolate to the remaining icing and thin with additional hot water if necessary (it's okay to add hot water to chocolate). Spread chocolate icing on remaining half of each cookie. You may need to add hot water a few times to keep chocolate icing from becoming to thick.

The cookies are best the day they are made. You can store them un-iced, refrigerated in an airtight container overnight, or freeze them for up to two weeks before icing.

April 11, 2010

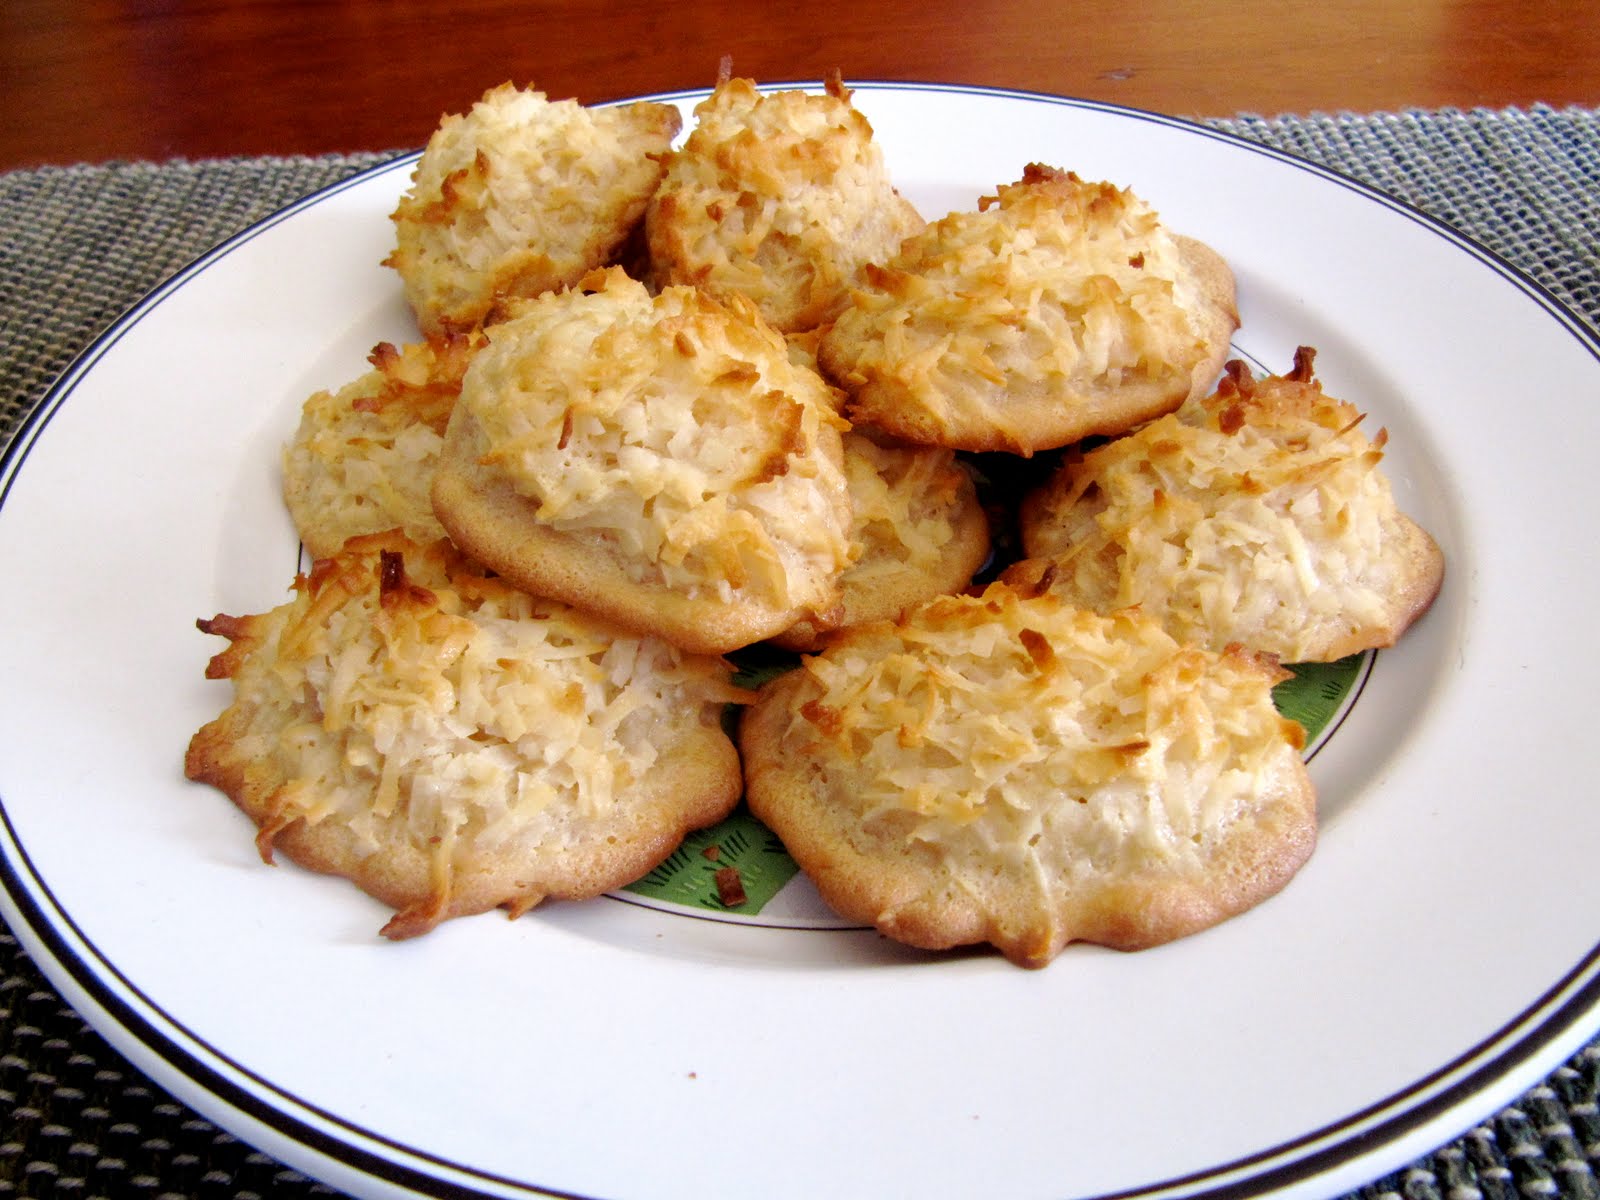
Coconut Macaroons


I'm trying to eat healthy these days and still satisfy my sweet tooth. Coconut macaroons answer the call because they are simple to make, delicious (if you like coconut), and relatively healthy as compared to most other cookies. There is no flour, no butter, no granulated sugar, and very little measuring which makes them an ideal treat when you're in a hurry and don't want to make a huge mess in the kitchen.


This recipe is from Ina Garten's Barefoot Contessa Family Style cookbook.

Coconut Macaroons

14 ounces sweetened shredded coconut
14 ounces sweetened condensed milk
1 t pure vanilla extract
2 extra large egg whites, room temperature
1/4 teaspoon kosher salt

Preheat oven to 325 degrees.

Combine the coconut, condensed milk, and vanilla in a large bowl. Separate the eggs and whip the egg whites and salt on high speed in the bowl of a mixer fitted with whisk attachment. Whip until egg white form medium peaks. Carefully fold the egg whites into the coconut mixture.

Drop the batter onto sheet pans lined with parchment paper using a 1 3/4 inch ice cream scoop or two teaspoons.

Bake for 25 to 30 minutes, until golden brown. Cool and serve.

These cookies are best eaten they day they are made, but will stay fresh and moist for approximately three days in an airtight container at room temperature.

Cookie Press Review

Seems to me this is an all or nothing cookie. Either you love them or you hate them. My tasters were split down the middle. Luckily, those who loved them, really loved them and came back for seconds. As I mentioned above, these cookies are best the day they are made, but will last a few days if kept at room temperature. What I love about them is that I didn't have to dirty measuring cups or spend time wiping spilled flour off of the counter top. The coconut is pre-measured. Just dump two small bags into a bowl and add the sweetened condensed milk into the coconut. Easy Peezy as chef Jamie Oliver says!

Cookie press rating: 3.5 cookies (out of five)

April 6, 2010

Easter Cutouts


Easter was only a few days ago and my blood sugar levels are returning to normal after gorging on peeps, jelly beans, chocolate cream pie, and sugar cutout cookies of bunnies, chicks, and bugs. Yes, bugs.

I confess that I didn't actually bake any cookies this week so I'm resorting to a little help from my sister-in-law who is a fan of the blog (Hi Tammy!) and who has made many of the cookies found here. Tammy arrived on Easter Sunday with a gorgeous array of cutout cookies iced with a wonderful looking sparkly icing in supercharged colors. After a few questions I found out that the cookie cutouts are from Martha Stewart's bug collection and the icing is sparkle gel from Wilton and comes in tubes.


I love the look of the brightly colored chicks, carrots, dragonflys and ladybugs. The cookie recipe is from Martha Stewart which always makes a deliciously buttery cookie.

As long as I'm sharing, here are the other dessert choices from Easter Sunday. My mom makes the best, tastiest pies on the face of the earth and we always have at least two to choose from. This year she made three amazing works of art.

Chocolate Cream Pie


Key Lime Pie


Lemon Meringue

March 31, 2010

Matzo Brittle


I'm crazy for matzo. Since Passover started yesterday it's the perfect time to make Matzo Brittle! In fact, it's so good that I plan on making another batch to bring with me on Easter Sunday. It's easy to make and incredibly delicious.

The recipe calls for fleur de sel, a hand-harvested sea salt that is moist, yet still has a nice crunch. I found it at Whole Foods and was able to buy a small amount. It's a good thing because it was priced at $19.99 per pound. Worth searching for, fleur de sel gives the brittle a distinct flavor unlike regular table salt.


Matzo Brittle

4 sheets of unsalted matzo (1/2 box)
2 sticks unsalted butter, cut into large pieces
1 cup packed light brown sugar
1 1/2 teaspoons fleur de sel
1/2 teaspoon vanilla extract
1 1/2 cups semisweet chocolate chips (I used a whole bag)
1 cup toasted, sliced almonds or toasted pecans coarsely chopped

Heat oven to 350 degrees and arrange rack to middle position.

Line a rimmed baking sheet with two overlapping pieces of aluminum foil and wrap edges over the sides. Arrange matzo in a single layer, breaking pieces as needed to fill empty spaces. Set aside.

Place butter, brown sugar, and 3/4 teaspoon fleur de sel in a small saucepan over medium heat and stir with a rubber spatula until the mixture comes to a boil, about 5 minutes. Continue to boil for 3 minutes more. Remove from heat, add vanilla. Pour slowly as the hot caramel may bubble up. Stir to combine.

Pour caramel over matzo and spread it evenly using a rubber spatula. Place baking sheet in the oven and bake matzo until small bubbles cover the surface and caramel is fragrant, about 10 minutes. Do not let caramel burn. Check after 8 minutes to be sure it doesn't!

Remove from oven, sprinkle with chocolate chips and set aside until chips are softened, about 5 minutes.

Spread chocolate evenly over the caramel using a rubber spatula. Sprinkle with nuts and remaining 3/4 teaspoon fleur de sel. (I used a bit more, and spread it evenly across the entire sheet by rubbing it gently between my palms).

Refrigerate the brittle until cool, about 15 minutes. Break into pieces and serve.

Note: I had trouble with the brittle sticking to the foil because the caramel seeped under the matzo. I popped the pan in the freezer for 1/2 hour and then I was able to easily peel off the foil from the back of the frozen brittle. I put the brittle on a large cutting board and cut the sheet into squares using a chef's knife.

Warning: This stuff is addictive. It's sweet, salty, and crunchy in every single bite.

March 24, 2010

Glazed Lemon Cookies


My dear friend and former co-worker Wendy simply adores these cookies. The first time I gave her one she took a bite and her eyes opened wide. The first thing she said was, "Wow, why are you still working here when you could be making these all the time!" She's probably right, but for now I refuse to give up my day job. Since Wendy first tasted these cookies I've switched jobs but I still share cookies with her whenever I can. One of my new co-workers, Sheryl, loves them just as much as Wendy (maybe even more).

These cookies are full of lemon flavor and remind me of springtime. The glaze is made with a tablespoon of cream cheese, two tablespoons of lemon juice, and 1 1/2 cups of powdered sugar. A simple concoction that elevates a good cookie to a fantastic cookie.

Try them for yourself and feel free to leave comments.

This recipe is from Cook's Illustrated's, March/April 2003 issue.

Glazed Lemon Cookies

3/4 cup sugar
2 T grated lemon zest plus 2 T juice from 2 lemons
1 3/4 cups all-purpose flour
1/4 t salt
1/4 t baking powder
12 T (1 1/2 sticks) cold, unsalted butter, cut into 1/2 inch cubes
1 large egg yolk
1/2 t vanilla extract

In a food processor fitted with a steel blade, process granulated sugar and lemon zest until sugar is damp and zest is incorporated, about 30 seconds.

Add flour, salt, and baking powder, pulsing to combine (about 10 one-second pulses). Scatter butter chunks over the mixture and pulse until dough resembles fine cornmeal (about 15 one-second pulses).

In a small bowl, beat together lemon juice, egg yolk, and vanilla with fork to combine. With machine running, add the mixture in a slow, steady stream (about 10 seconds) and continue processing until dough begins to form ball, 10 - 15 seconds longer.

Turn dough and any dry bits onto the counter and working quickly, gently knead the dough until it comes together and no dry bits remain. Shape dough into log about 10 inches long and 2 inches in diameter. Wrap dough in parchment paper (or wax paper) and twist ends to seal tightly. Chill dough until firm and cold, about 45 minutes in the freezer or 2 hours in the refrigerator.

To bake: Preheat oven to 375 degrees.

Line baking sheets with parchment paper. Unwrap dough log and using a sharp knife, slice dough into rounds 3/8 thick. Place on baking sheets 1 inch apart and reshape into rounds if cookies loose shape. If dough gets too soft, place back in wrapper, close tightly and return to freezer for a few minutes.

Bake until edges are golden brown, about 14 to 16 minutes, rotating baking sheets from front to back and top to bottom halfway through baking. Cool cookies on baking sheets for a few minutes before transferring cookies to a wire rack to cool completely before glazing.

Glaze

1 T softened cream cheese, softened
2 T juice from 1 lemon
1 1/2 cups powdered sugar

Whisk cream cheese and lemon juice in medium nonreactive bowl until no lumps remain. Add powdered sugar and whisk until smooth.

Spoon a scant teaspoon of glaze onto each cookie and spread evenly with back of spoon, 1/8 inch from edge of each cookie.

Variation: Lime Glazed Cookies
Substitute lime zest and lime juice in equal proportions.

Cookie Press Review

These cookies are a hit with every single person who has ever tasted them in my presence. They're easy to prepare and the glaze is virtually fail proof.

Cookie press rating: 5 lemony cookies (out of five)

March 16, 2010

St. Patrick's Day Cutouts


Tomorrow is St. Patrick's Day! The day the Irish and the pseudo Irish watch a parade and then hit the bars. I suspect there will be many people calling in sick on Thursday.

Over the weekend I made these cutout cookies to celebrate. I'm bringing them into work tomorrow and sharing with my co-workers. We've all be working hard lately and they deserve a little treat.

The cookie is a basic sugar cookie with royal icing. Click here for the previously posted recipes from the Penguin cookies I made a few months ago.

I unscrewed the green cap from the food coloring and put a drop into the mixing bowl only to find out the container was mislabeled and I had just made light blue icing! Luckily, I remembered that blue and yellow make green. With a few drops of yellow and a splash of creme de menthe, I remedied the situation and had a nice light green icing. Whew! That was close. My co-workers will never know that I almost gave them blue shamrocks.

Happy St. Patrick's Day!

March 12, 2010

Chocolate Mint Wafers


The girl scouts are at it again. Hawking cookies in public spaces, they stand in front of supermarkets, drugstores, and on street corners. They sometimes shout as you exit the stores as if you aren't already helplessly drawn to the table of cookies like a moth to a porch light. You simply can't resist the little buggers in their tacky green uniforms making eye contact and being as sweet as the cookies they're selling.

They use cuteness to lure you in and make a killing from overpriced (but yummy) cookies like Samoas, Trefoils, Tagalongs, and last year's new cookie, Dulce de Leche. Two boxes? Sure no problem. Three boxes? Why not, it's for a good cause. Four boxes? I can always freeze them. Yeah right.

My absolute favorite are those addictive Thin Mints. Some people smoke, some do illicit drugs. I do Thin Mints.

About two years ago, I found a recipe for chocolate-mint wafers in Martha's Everyday Food magazine that are very much like the Thin Mints I adore so much.

For the cocoa powder, I used Droste, dutch processed cocoa imported from Holland. If you can find it, (and can afford a splurge) it's totally worth it. Pricey, at about $7 - $9 per 8 ounce box, it has an intense chocolate flavor without the bitterness of unsweetened cocoa powder.

These cookies are easy to make. Be patient when dipping the wafers into the chocolate. Let the chocolate drip back into the bowl and gently scrape the bottom of the fork on the side of the bowl to remove excess chocolate.

Chocolate Mint Wafers

1 cup all-purpose flour
1/2 cup unsweetened cocoa powder
1/4 teaspoon baking powders
1/4 teaspoon (plus 1/8 teaspoon salt for chocolate coating)
6 tablespoons (3/4 stick) unsalted butter, room temperature
1/2 cup sugar
1 large egg
1/2 teaspoon pure vanilla extract
12 ounces semi-sweet or bittersweet chocolate
1/4 teaspoon peppermint extract

Preheat oven to 350 degrees. In a medium bowl, whisk together flour, cocoa, baking powder, and 1/4 teaspoon salt. Set aside.

In the bowl of an electric mixer, beat butter and sugar until light and fluffy. Beat in egg and vanilla. With mixture on low, gradually add flour mixture. Mix until combined being careful not to over mix.

Form balls of dough about 1 teaspoon each, and place on cookie sheets. Dip bottom of a glass in water, and flatten balls into 1 1/2 inch round discs (about 1/4 inch thick). Bake until slightly firm to the touch, 8 to 10 minutes. If baking two pans at a time, rotate pans midway through baking. Transfer cookies to wire rack to cool.

Place chocolate, peppermint extract, and remaining 1/8 teaspoon salt into a double boiler, or large, heatproof bowl set over a pan of simmering water. Heat, stirring occasionally, until smooth, 2 to 3 minutes. Remove from heat.

Line a baking sheet with waxed paper. Dunk each cookie into the chocolate and carefully remove using a fork. Carefully scrape the bottom of the fork against the side of the bowl to remove excess chocolate. Allow chocolate to drip off.

Refrigerate until chocolate has hardened, about 30 minutes. Keep cookies chilled until ready to serve.

Cookie Press Review


These cookies are simply incredible. A rich, chocolate cookie covered in an intense layer of bittersweet chocolate, I can't think of anything better. My tasters comments weren't audible over the ummms and ooohs. I'll take that as a good sign.

Cookie press rating: 5 cookies (out of 5). A perfect score!