Showing posts with label chocolate. Show all posts

March 2, 2011

Crispy Cocoa-Walnut Ice Cream Sandwich Cookies


Many of you may be wondering where I've been for the last month or so since my last post back in late January. My life has been consumed by the stressful process of moving. Well, not just moving, but the whole real estate buying process in general. Moving in and of itself is stressful. Add that to a city co-op real estate transaction and it's enough to make anyone start taking Xanax. But all that's behind me and all that's left is unpacking a few boxes and deciding where to hang pictures. The fun stuff.

Needless to say, I haven't had much time to bake and I am going through withdrawals. Kind of like Charlie Sheen these days. Frankly, I'm a little scared to bake in my new oven. It's fairly old and so far the temperature dial is only a mere suggestion of what the inside heat might be. I stress the word MIGHT. Last night I made a meatloaf and set the oven for 350 degrees. About 30 minutes in I checked and the oven thermometer inside was 400! Luckily, I have a window next to the oven so when I do burn something I just open the window and wave the smoke out.

A few weeks before the move I made a special treat for Valentine's Day. Crispy Cocoa-Walnut Cookies admirably served as the outer shell enveloping creamy vanilla ice cream. Topped with chocolate sauce, this dessert was a magnificent ending to a merely average dinner.

Feel free to make these any time of the year. Summer would be an ideal time. Or now. How about right now? Who can resist an ice cream cookie sandwich? No one that I know.

The cookie recipe is courtesy of bon appétit's February issue. The ice cream part was my idea. I substituted walnuts for pecans but you can use any nuts. I think hazelnuts would be an excellent choice.


Crispy Cocoa-Pecan (Walnut) Cookies


1 1/2 cups all-purpose flour
3 tablespoons natural unsweetened cocoa powder (scooped, then leveled)
1/2 teaspoon baking soda
10 tablespoons (1 1/4 sticks) unsalted butter, melted and cooled
1/3 cup (lightly packed) brown sugar
1/3 cup sugar
2 tablespoons plus 2 teaspoons light corn syrup
2 tablespoons whole milk
1 teaspoon vanilla extract
1 cup chopped nuts (pecans or walnuts)
1/2 cup bittersweet chocolate chips

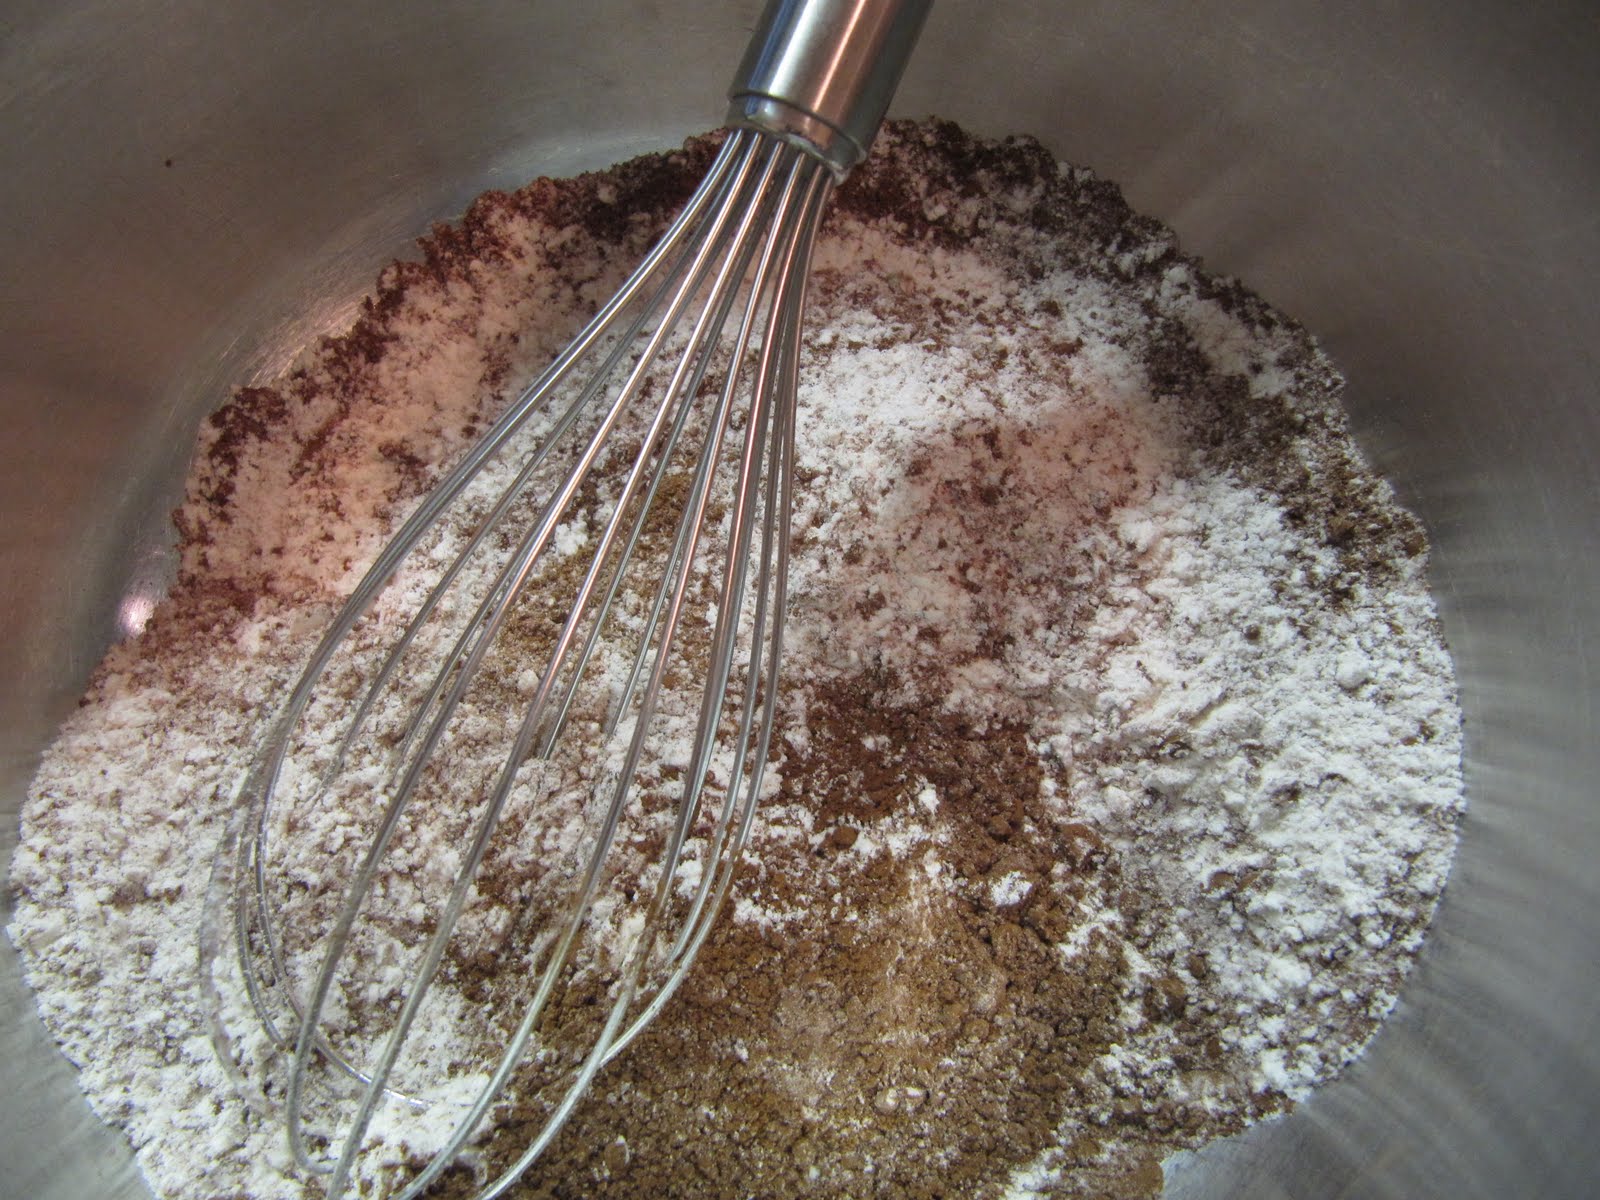
Whisk flour, cocoa, baking soda, and 1/2 teaspoon salt in a medium bowl. Stir butter, brown sugar, sugar, corn syrup, milk, and vanilla in another medium bowl until smooth. Stir in the flour mixture, then nuts. Cover and chill until firm, about 4 hours or overnight.

Position 1 rack in the top third and 1 rack in the bottom third of the oven and preheat to 325 degrees.

Line 3 large baking sheets with parchment. Measure 2 level tablespoons dough and roll between palms into a ball. Place on prepared baking sheet. Using the palm of your hand, gently press the dough onto the cookie sheet to form a 3-inch diameter disk. Repeat with remaining dough, spacing 5 inches apart.

Bake cookies 8 minutes, reverse sheets. Continue baking until cookies are flat and beginning to darken around the edges, about 10 more minutes. Transfer cookies on parchment paper to rack. Cookies will crisp while they cool.

Store cookies in an airtight container at room temperature.

Form Ice Cream Sandwiches

Let ice cream soften for 5 minutes or so. Scoop one generous portion of vanilla ice cream onto the bottom of one cookie and then place another cookie on top, pressing gently. Remove any excess ice cream by gently scraping the sides of the cookie with a spatula. Top with melted bittersweet chocolate and serve immediately. Or place on cookie sheet and return sandwiches to the freezer until ice cream has hardened and chocolate has set. Wrap tightly in plastic wrap. Best eaten within 5 days.

Cookie Press Rating: 4 cookies (out of 5)

January 21, 2011

Hazelnut Crinkle Cookies


Hazelnuts are high in protein and relatively low in fat as compared to other nuts. Also known as Filberts, these babies have tons of fiber, iron, phosphorus, vitamins B1, B2, C, and E, folate, and other essential nutrients. They are the champion of nut family, contributing to lower cholesterol levels. Just think of what a daily dose of hazelnuts combined with a statin like Lipitor would do to lower your cholesterol.

Plus, did I mention they taste delicious to boot? That is, if you're not allergic.

As in life, with the good comes the bad. Hazelnuts have a skin which can be difficult (and messy) to remove. Perhaps that's why they're not as popular as walnuts or pecans (just a theory).

I'll be honest. These cookies took time to make. Most of it was spent removing the skins after a boiling, washing, and drying process which I'll describe later. That said, if you can find blanched hazelnuts, buy them. My local Wholefoods did not have them, so I was stuck spending nearly an hour trying to get the tough skins removed.

I tried a new method of removing skins and it worked well. The traditional way involves roasting the nuts in a 350 degree oven for about 10 minutes and then placing the nuts in a dish towel and rubbing the heck out of them until the skins come off. The new way is easier. Bring a quart of water to a boil in a saucepan and add 4 tablespoons of baking soda. Turn down the head to avoid a messy boil over and continue boiling for 3 - 4 minutes. Drain nuts in a colander and then rinse under cold water. Rub between your palms under the water and skins will come off easily. Dry on paper towels and roast in the oven as described above. Nuts may take longer to toast depending on how much water they absorbed.

Chop nuts by hand with a chef's knife or place in a food processor being careful not to chop nuts into a fine powder. You want to retain the texture.

Skinned and Toasted Hazelnuts Ready for Chopping


Hazelnut Crinkle Cookies
(adapted from Better Homes & Gardens, November 1995 issue)

3 cups all-purpose flour
2 teaspoons baking powder
1/2 teaspoon salt
1 11 ounce jar of chocolate hazelnut spread (Nutella or similar)
1/4 cup shortening
1 1/3 cups sugar
1 teaspoon vanilla
2 eggs
1/3 cup whole milk
1/2 cup chopped, toasted hazelnuts (see above for toasting instructions)
Additional finely chopped hazelnuts (about 1 1/2 cups)
Confectioners sugar for rolling and dusting

In a medium mixing bowl combine flour, baking powder, and salt. Set aside.

In a large mixing bowl combine chocolate-hazelnut spread and shortening. Beat with an electric mixer on medium speed until combined. Add sugar and beat until fluffy. Add vanilla and egg. Beat until combined.

Alternately add flour mixture and milk to creamed mixture, beating on medium speed until just combined. Stir in 1/2 cup chopped hazelnuts. Cover and chill for about 2 hours until firm.

Preheat oven to 375 degrees.

Shape dough into 1 or 1 1/2 balls. Roll in finely chopped hazelnuts and then in confectioners sugar. Place balls 2 inches apart on a lightly greased cookie sheet or on parchment paper.

Bake at 375 degrees for 8 to 10 minutes until surface is cracked and cookies are set. Cool on wire rack. When cool dust in confectioners sugar again and store in an airtight container at room temperature. Makes approximately 6 dozen cookies.

Cookie Press Review:
These cookies are bursting with hazelnut flavor and are a nice change from other chocolate and nutty cookies. The texture is light, with a soft and chewy center. Perfect with tea or a glass of milk, these cookies get my seal of approval. They would be great to include in a holiday cookie assortment or to be devoured at any time during the year.

Cookie Press rating: 4 cookies (out of 5)

December 23, 2010

Brownie Squares


Christmas is just two days away and I have to say that I'm very prepared this year. My shopping is done, cards mailed, and cookie assortment completed and shared. I have just one gift left to wrap and a dessert to make for Christmas Eve. I think that's pretty darn great for December 23rd. I could get used to not working. But I really shouldn't.

A few years ago Gourmet Magazine featured a basic butter cookie recipe and many cookies that you could make using the butter cookie dough as a base and adding a topping or flavoring to make a whole new cookie. I liked the idea of adding a brownie topping to the butter cookie base since I don't consider brownies to be very festive in and of themselves. By pressing the delicious butter cookie dough into a 9 x 13 inch pan, baking it, and then topping it with a chocolaty brownie and baking it again the normally dull brownie gets a starring role as a cookie. Omit the nuts if you want, but I think they give the cookie some needed crunch.

Basic Butter Cookies

2 cups all-purpose flour
1/2 teaspoon baking powder
1/2 teaspoon salt
1 1/2 sticks (3/4 cup) unsalted butter, softened
1 cup sugar
1 large egg
1/2 teaspoon vanilla

Whisk together flour, baking powder, and salt in a small bowl.

Beat together butter and sugar in a large bowl with an electric mixer at medium-high speed until pale and fluffy, about 3 - 4 minutes. Beat in egg and vanilla. Reduce speed to low, add flour mixture and mix until just combined.

Grease a 9 x 13 inch metal baking pan, then line with foil, leaving a 2-inch overhang on both ends. Then grease foil.

Press dough evenly into bottom of baking pan, using plastic wrap or wax paper on top to keep dough from sticking to your fingers. Chill until firm, about 20 minutes.

As crust chills, preheat oven to 375 degrees.

Bake crust until golden brown, about 20 - 25 minutes. Do not over bake. Remove from oven and cool on wire rack for 20 minutes. Leave oven on.

As crust cools, make the brownie topping.

Brownie Topping


1 1/2 sticks (3/4 cup) unsalted butter
10 1/2 ounce bittersweet chocolate, chopped (do not use unsweetened)
1 1/2 cups packed light brown sugar
3 large eggs, lightly beaten
1 1/4 teaspoons vanilla
3/4 cup all-purpose flour
1/4 cup plus 2 tablespoons Dutch-processed unsweetened cocoa powder
3/4 teaspoon salt
1 1/2 cups walnuts, coarsely chopped (toast walnuts by placing them on a baking sheet in a 350 degree oven for 5 - 6 minutes. Check often and shake pan during toasting.)

Melt butter and chocolate with brown sugar in a 3-quart heavy saucepan over moderate heat, stirring occasionally, until smooth. Remove from heat, then whisk in eggs and vanilla until combined well. Whisk in flour, cocoa, and salt, then stir in walnuts (if using).

Spread brownie batter over cooled crust and bake until set, about 20 minutes. Cool completely in pan on rack, about 1 1/2 hours. Lift from pan and using a heavy knife (Chef's knife), cut into 1-inch squares. Running knife under hot water and wiping dry will aid in making clean cuts.

Cookie press rating: 4 cookies (out of 5)

December 15, 2010

Double Chocolate-Peppermint Crunch Cookies


Every year I try a few new cookie recipes. Well, to be honest more than a few. Many are not worth writing about, but every now and then I come across a winner. Double Chocolate-Peppermint Crunch cookies definitely fall into the winner category.

I found the recipe in the December Bon Appetit magazine. I think what grabbed me was the enormous spread devoted to these festive gems. The larger than life cookies jumped off the page. The crushed peppermint candies and the melted chocolate decorating the tops make these the quintessential Christmas cookie. The cookie is soft, chocolaty, and is gently flavored with peppermint extract.

I baked these over the weekend and stored them in an airtight cookie tin overnight before I finished them off with the melted chocolate and candy. I popped them into the freezer and will share them with friends next week when the rest of my cookies are ready for distribution to friends and family.

May God bless those Bon Appetite editors. Seriously, I think I have a new favorite cookie.


Double Chocolate-Peppermint Crunch Cookies


2 1/2 cups bittersweet chocolate chips (not to exceed 61% cacao; 15 to 16 ounces)
1 1/2 cups all-purpose flour
1/4 cup natural unsweetened cocoa powder
1 teaspoon baking powder
1 teaspoon instant espresso powder
1/2 teaspoon salt
1/2 cup (1 stick) unsalted butter, softened
1 cup sugar
1 teaspoon vanilla extract
1 teaspoon peppermint extract
2 large eggs
4 candy canes or 16 hard peppermint candies, coarsely crushed

Preheat oven to 375 degrees. Line 2 rimmed baking sheets with parchment paper. Stir 2 cups chocolate chips in medium metal bowl set over saucepan of simmering water until melted and smooth (or use a double boiler). Measure 2/3 cup melted chocolate; transfer to a small bowl and reserve for drizzling.

Whisk flour, cocoa powder, baking powder, espresso powder, and salt in medium bowl. Using an electric mixer, beat butter in large bowl until creamy. Add sugar and extracts, beat until smooth. Add eggs, beat to blend. Beat in melted chocolate from medium bowl. Add dry ingredients, beat until just blended. Stir in remaining chocolate chips. Chill dough for 20 - 30 minutes if too warm to form into balls. Measure 1 level tablespoonful dough and roll between palms to form a ball. Place on prepared baking sheet. Repeat, spacing cookies 1 1/2 inches apart.

Bake until cookies are cracked on top, 8 to 9 minutes. Cookies should remain moist. Do not over bake. Cool cookies on baking sheet 5 minutes. Transfer cookies on parchment paper to racks to cool completely.

Finish cookies by rewarming reserved 2/3 cup chocolate in microwave or over saucepan of simmering water. Drizzle chocolate over cookies using a fork. Sprinkle crushed peppermints on each cookie. Chill until chocolate sets, about 20 minutes.

Can be made ahead of time and frozen in an airtight container for up to 3 weeks. Bring to room temperature before serving.

Cookie Press rating: 5 cookies! (out of 5)

December 10, 2010

Peanut Butter-Chocolate Kisses

This week has been hectic for sure. I had planned to post several of my favorite holiday cookie recipes, but the week just seemed to get away from me. So now that I have a few minutes, I'd like to share one of my tried and true cookie recipes. No cookie plate is complete without Peanut Butter-Chocolate Kisses. These are super easy to make, especially with kids. And best of all, you can eat any leftover chocolate kisses. And there are always some leftover!

Baker's tip: unwrap the Hershey kisses as cookies bake so that they're ready to go or better yet, have your helper do it.

The recipe says to immediately press the kiss into the top of each cookie as soon as they're out of the oven but I prefer to wait a minute or so. The cookie will still be soft, but will not be so hot as to start to melt the chocolate. Don't wait too long though, or the kiss will not stick to the cookie!

Peanut Butter-Chocolate Kisses

1/2 cup granulated sugar
1/2 cup lightly packed brown sugar
1/2 cup creamy peanut butter
1/4 cup butter, softened
1/4 cup shortening
1 egg
1 1/2 cups all-purpose flour
3/4 teaspoon baking soda
1/2 teaspoon baking powder
granulated sugar for rolling dough
36 Hershey's chocolate candy kisses

Heat oven to 375 degrees
Mix 1/2 cup granulated sugar, brown sugar, peanut butter, butter, shortening, and egg thoroughly. Stir in flour, baking soda, and baking powder. Mold dough into 1-inch balls then roll them in sugar. Place about 2 inches apart on an ungreased cookie sheet. Bake for 8 to 10 minutes. Remove sheet from oven, wait 1 minute and press candy kiss firmly in the middle of each cookie. Let cool completely.

December 3, 2010

Chocolate Gingersnaps


I normally follow recipes very closely to avoid any surprises at the end. This week for some reason my creativity blossomed and I decided to step out of my comfort zone a bit and try to improve a cookie that I already love. Gingersnaps are one of those classic cookies that just about everyone loves. Perfect for dunking into a cup of hot tea or a glass of milk, the spicy gingersnap belongs in the Cookie Hall of Fame.

At some point while I was measuring out the spices for the cookie I said to my self, "self, what if I add some dutch processed cocoa powder to the dough?" So I did. The result was a nice combination of subtle chocolate mixed with the spice of the ginger and cloves. I diced up some candied ginger and garnished the top of each cookie before popping them in the oven. When the cookies came out of the oven I added some white sanding sugar for a festive touch.

The cookies came out wonderfully, just as I had hoped. They are darker than traditional gingersnaps, but still pack that ginger punch. The candied ginger on top not only looks great, but adds some additional ginger flavor and sweetness to the cookie.

Try these and let me know what you think. Would you add more chocolate? More spices? I'd love for you to add comments below.

This Gingersnaps recipe is from Epicurious.com with my additions noted.

Chocolate Gingersnaps

2 1/4 cups all-purpose flour
1 teaspoon baking soda
1 1/2 teaspoons ground ginger
1 teaspoon ground cinnamon
1/2 teaspoon ground cloves
2 tablespoons dutch-processed cocoa powder
1 cup lightly packed brown sugar
1 1/2 sticks (3/4 cup) unsalted butter
1/4 cup unsulfured molasses
1 egg
1/4 cup granulated sugar
Candied ginger for garnish, chopped finely

In a large bowl sift together 1 cup plus 2 tablespoons of flour, baking soda, cocoa powder, and spices. Whisk in brown sugar.
In a small saucepan melt butter and whisk into flour mixture with molasses and egg until combined well. With a wooden spoon, stir in remaining 1 cup plus 2 tablespoons flour until combined well. Chill dough until firm, at least 1 hour or up to 2 days.

Preheat oven to 350 degrees and line baking sheets with parchment paper.

Roll level tablespoons of dough into balls and in a small bowl roll balls in granulated sugar to coat. Arrange balls about 2 inches apart on baking sheets and gently press each with the bottom of a glass to flatten slightly. Top each cookie with a few pieces of candied ginger pressing down slightly.

Bake 10 - 12 minutes until cookies have puffed slightly. When removed from the oven, cookies will collapse slightly and contain little cracks. While cookies are still hot, sprinkle lightly with white sanding sugar. Cool cookies on sheets for 2 - 3 minutes more and then transfer to cooling racks.

Cookies keep in an airtight container at room temperature for 5 days.

Cookie press rating: 4 cookies (out of 5)

October 20, 2010

Chewy Chocolate Raisin Cookies


I am constantly clipping out cookie recipes and tucking them inside of cookbooks or pasting them into binders. I would be a prime subject for a new reality show called "Recipe Hoarders." I know I'll never end up making many of them, but just knowing I can is comfort enough. This week's cookie falls into the hoarder category. I don't remember when I first clipped it, but my guess is within the past two years. What attracted me to this recipe for Chewy Chocolate Raisin Cookies was the huge picture included on the page. The cookie photo is of a beautiful chocolaty brown cookie with a large white chocolate chunk and flecks of sugar coating the outside. It's my idea of not only a tasty cookie, but a beautiful one too.

This recipe is fairly easy to prepare. It requires soaking the golden yellow raisins in 1/2 cup of brandy for 20 minutes. While the raisins are soaking, I continued to measure and prepare both the wet and dry ingredients.

The chewiness of the cookie was evident from the very first bite. I detected a hint of the white chocolate, a hint of brandy-soaked raisins, and a hint of honey but not much else. Actually, they tasted like a chewy ginger snap. Don't get me wrong, these are good cookies. Especially if chewy cookies are your thing. But overall, they left me wanting a more intense flavor. Next time I may try swapping the raisins for dried sour cherries and use more and larger white chocolate chunks.

Chewy Chocolate-Raisin Cookies

1 cup golden raisins, coarsely chopped
1/2 cup brandy
1 1/2 cups all-purpose flour
3 tablespoons Dutch-processed cocoa powder
1 1/2 teaspoons ground cinnamon
3/4 teaspoon baking soda
1/2 teaspoon coarse salt
1 stick unsalted butter, softened
1/2 cup packed light-brown sugar
1/2 cup honey
6 ounces white chocolate, cut into 1/2 inch chunks (try 3/4 inch chunks)
1/2 cup granulated sugar

Bring chopped raisins and brandy to a boil in a small saucepan. Remove from heat, stir, and let stand for 20 minutes.

Mix flour, cocoa, 1 teaspoon cinnamon, baking soda, and salt together in a small bowl.

Preheat oven to 325 degrees. Beat butter and brown sugar with a mixer set on medium speed until pale and fluffy, about 2 minutes. Add honey, and beat until creamy. Reduce speed to low, add flour mixture, and beat until combined. Drain raisins, discard liquid. Add raisins and chocolate to the dough. Mix to combine.

Whisk together granulated sugar and remaining 1/2 teaspoon of cinnamon. Scoop 2 tablespoons of dough, roll into a ball and then roll in cinnamon-sugar mixture to coat completely. Place on parchment-lined baking sheets about 2 inches apart. Bake until just set and starting to crack, 18 to 20 minutes. Let cool on sheets.

Store cookies in an airtight container at room temperature for up to 3 days.

Cookie press review: 3 1/2 cookies (out of five)

Raisins and Rum Boiling on the Stove


Whisking the Dry Ingredients Together


Mixing in the White Chocolate and Raisins


Ready for the Oven


Cooling on the Pan

August 19, 2010

Chocolate-Marshmallow Treats


Even the thought of turning on my oven when the temps climb to over 90 degrees makes me start to sweat. Tiny droplets form on my upper lip and I feel like someone is holding a lit match to my skin.

Oppressively hot weather causes a problem for bakers since baking usually requires the oven to be on for periods of longer than twenty minutes. If you're baking a few batches of cookies or prefer to bake one sheet at a time like I do, your oven could be on for well over an hour which either means your A/C is working overtime or your kitchen temperature rises to something feeling like hell.

To combat the steamy kitchen syndrome, or SKS as I like to call it, I went in search of some no-bake cookie recipes. I found some on Martha's website and while I don't classify these as cookies, they will do in a pinch to satisfy a summer sweet tooth.

This recipe for Chocolate-Marshmallow Treats is prepared on the stove top using a single burner for about 6 - 7 minutes. The treats remind me of the Rice Krispie Treats I used to make as a kid, with Mom's help of course. Martha has kicked it up a notch by adding dutch-processed cocoa powder to the marshmallows and bittersweet chocolate on the top.

I liked these because I could really taste the deep chocolate flavor and they didn't seem overly sweet to me. Mike enjoyed them too, but he said the crisps looked like lentils. As usual, he's right. I couldn't get Rice Krispies at Whole Foods, so I substituted with the Whole Foods, 365 Organic brand of Brown Rice Crisps which do in fact resemble lentils.

Crispy Chocolate-Marshmallow Treats

6 tablespoons unsalted butter
1 bag (10 1/2 ounces) mini-marshmallows
1/4 cup unsweetened Dutch-processed cocoa powder
6 cups crisp rice cereal
1 ounces bittersweet chocolate

Line bottom of and 8 or 9 inch square baking pan with parchment paper or aluminum foil, leaving a 2-inch overhang. If using foil, spray lightly with non-stick spray.

In a large saucepan (approx. 4 qt.) combine butter, marshmallows, and cocoa. Cook over medium heat, stirring frequently, until melted, about 6 minutes. Sir in rice cereal. Press rice mixture into prepared pan. Wetting fingers with cold water will allow you to combat the stickiness of the marshmallows. Re-wet fingers as needed.

Drizzle with melted chocolate. Let cool to room temperature. Cut into 16 bars.

Store in an airtight container at room temperature for up to 5 days.

Variations:
Add 1/2 cup of dried fruit such as cranberries or cherries.
Crush up peppermint candies or add 1/2 teaspoon of peppermint extract.

Melting Marshmallows on the Stovetop


Cookie press rating: 3.5 cookies (out of 5)

Some other no-bake cookie recipes:

Peanut-Butter Granola Bars

Coconut-Pecan Cereal Bars

Coconut-Chocolate Patties

June 17, 2010

Coconut Pyramids


I love cookies that form interesting shapes. So when I received this cookie recipe from a friend's mom (thanks Mrs. Jarossy!), I was totally intrigued by the look of these miniature pyramid cookies. How cool!

These are a new interpretation of classic macaroons. They take more time to shape than simply dumping a mound of coconut onto cookie sheets, but for presentation purposes these are much more elegant. Serve these at a Egyptian-themed party or make them with your kids after you've been to the King Tut exhibit.

A few hints on shaping these cookies. The original recipe shaped the cookies into 3 sided pyramids. I found that more difficult than making a 4 sided pyramid. I suggest you try both and see which you like better. I tried several different spatulas to shape the cookies. A larger, very rigid plastic spatula worked best. A regular spatula seemed too pliable. I held the sides of the cookie with my fingers and placed the spatula on one side of the cookie and tilted it at a 45 degree angle. This worked best. You will likely need to go around the cookie several times before you get the shape looking like a pyramid.

Dipping the tops in chocolate seemed superfluous. I would forgo that step completely and get right down to the business of eating them. When I tried to dip more of the cookie in the chocolate, they fell apart or looked like a chocolate blob. Yes, definitely skip the chocolate.

Coconut Pyramids


1 3/4 cups sugar
5 1/4 cups unsweetened, shredded coconut
7 large egg whites
Pinch of salt
2 tablespoons unsalted butter, melted
1 teaspoon pure almond extract
1 teaspoon pure vanilla extract
4 ounces semisweet chocolate
1/2 teaspoon pure vegetable shortening

Line a baking sheet with parchment paper. In a large bowl, using your hands, mix together sugar, coconut, egg whites, and salt. Add butter and extracts, and combine well. Refrigerate for at least 1 hour.

Heat oven to 350 degrees.

Moisten palms with cold water. Roll 1 tablespoon of coconut mixture in palms, squeezing tightly together 2 or 3 times to form a compact ball. Place ball on a clean surface, and using a spatula, flatten one side at a time to form a 4-sided pyramid shape.

Place pyramids onto prepared baking sheet, about 1 inch apart, and bake until edges are golden brown, about 15 minutes. Leave the baking sheet on a wire rack to cool completely. As the cookies cool, with your fingers, gently reshape any that have lost the point on the tops.

Place chocolate and shortening in a small heatproof bowl, and set pan over another pan of simmering water. Stir occasionally until melted. Do not let water come in contact with the chocolate (even a drop!). Dip top 1/2 inch of each pyramid in the melted chocolate. Set each dipped cookie on baking sheet and allow chocolate to harden.

Store in an airtight container at room temperature for up to 5 days.

Yield: approximately 45 cookies

May 11, 2010

Double Dark Chocolate Cookies


Lately my office mates have been harassing me to bring in cookies by plastering my Facebook page with requests and comments. I must admit now that the weather has improved, I spend less time in the kitchen and more time outdoors. It's time to get serious about cookies again and this use of social media to nudge me back into the kitchen made me laugh. What next? Will I be hosting SNL a la Betty White? I hear there is another Facebook group lobbying for Ms. White to host the Oscars. I say hooray for Betty!

On my way home from work I popped in to Wholefoods and headed for the baking aisle to pick up some chips. I grabbed the last bag of Guittard 63% cacao extra dark chocolate chips and headed for the checkout. I have never tried Guittard chocolate and am happy to report the chips exceeded my expectations. At $3.99 per bag, were the least expensive chip available at "Wholepaycheck."

I like to try recipes I find on the side of boxes and bags. These recipes are extensively tested to make sure they work. After all, why would a manufacturer print a recipe that isn't thoroughly tested? Their reputations are at stake. I set right to work making the recipe on the side of the Guittard chocolate chip bag.

The dough is rather moist and you may want to pop it in the refrigerator for twenty minutes or so before baking (but it's not necessary). Be sure not to over bake these cookies. 11 - 12 minutes at 350 degrees is the perfect amount of time. You want the centers to remain soft and chewy. Also be careful when melting the chocolate in the microwave. I almost burned it because I don't know how to set my microwave at 50% power.


Double Dark Chocolate Cookies


1 stick butter, softened (1/2 cup)
1 cup sugar
1/2 teaspoon salt
1/2 teaspoon baking soda
2 large eggs
1 teaspoon vanilla extract
1 1/4 cups unsifted all-purpose flour
2 cups (12 ounces) dark chocolate chips
2 tablespoons water

Preheat oven to 350 degrees. Line baking sheets with parchment.

Heat one cup of chips and water in a small microwave safe bowl at medium power for 1 - 2 minutes, stirring well after 1 minute, then after 30 second intervals until smooth, set aside.

Cream butter, sugar, and salt in a large bowl until light. Beat in eggs and vanilla until smooth. Add melted chocolate, stopping to scrape bowl as needed. Mix in flour and baking soda just until incorporated. Stir in the remaining cup of chips. Dough will be moist and soft.

Drop rounded teaspoonfuls onto prepared baking sheets. Bake 11 - 12 minutes or until tops are cracked and crusty. Centers should be soft and appear slightly underdone. Let stand 5 minutes before removing to cooling racks to cool completely. Store in an airtight container.

March 12, 2010

Chocolate Mint Wafers


The girl scouts are at it again. Hawking cookies in public spaces, they stand in front of supermarkets, drugstores, and on street corners. They sometimes shout as you exit the stores as if you aren't already helplessly drawn to the table of cookies like a moth to a porch light. You simply can't resist the little buggers in their tacky green uniforms making eye contact and being as sweet as the cookies they're selling.

They use cuteness to lure you in and make a killing from overpriced (but yummy) cookies like Samoas, Trefoils, Tagalongs, and last year's new cookie, Dulce de Leche. Two boxes? Sure no problem. Three boxes? Why not, it's for a good cause. Four boxes? I can always freeze them. Yeah right.

My absolute favorite are those addictive Thin Mints. Some people smoke, some do illicit drugs. I do Thin Mints.

About two years ago, I found a recipe for chocolate-mint wafers in Martha's Everyday Food magazine that are very much like the Thin Mints I adore so much.

For the cocoa powder, I used Droste, dutch processed cocoa imported from Holland. If you can find it, (and can afford a splurge) it's totally worth it. Pricey, at about $7 - $9 per 8 ounce box, it has an intense chocolate flavor without the bitterness of unsweetened cocoa powder.

These cookies are easy to make. Be patient when dipping the wafers into the chocolate. Let the chocolate drip back into the bowl and gently scrape the bottom of the fork on the side of the bowl to remove excess chocolate.

Chocolate Mint Wafers

1 cup all-purpose flour
1/2 cup unsweetened cocoa powder
1/4 teaspoon baking powders
1/4 teaspoon (plus 1/8 teaspoon salt for chocolate coating)
6 tablespoons (3/4 stick) unsalted butter, room temperature
1/2 cup sugar
1 large egg
1/2 teaspoon pure vanilla extract
12 ounces semi-sweet or bittersweet chocolate
1/4 teaspoon peppermint extract

Preheat oven to 350 degrees. In a medium bowl, whisk together flour, cocoa, baking powder, and 1/4 teaspoon salt. Set aside.

In the bowl of an electric mixer, beat butter and sugar until light and fluffy. Beat in egg and vanilla. With mixture on low, gradually add flour mixture. Mix until combined being careful not to over mix.

Form balls of dough about 1 teaspoon each, and place on cookie sheets. Dip bottom of a glass in water, and flatten balls into 1 1/2 inch round discs (about 1/4 inch thick). Bake until slightly firm to the touch, 8 to 10 minutes. If baking two pans at a time, rotate pans midway through baking. Transfer cookies to wire rack to cool.

Place chocolate, peppermint extract, and remaining 1/8 teaspoon salt into a double boiler, or large, heatproof bowl set over a pan of simmering water. Heat, stirring occasionally, until smooth, 2 to 3 minutes. Remove from heat.

Line a baking sheet with waxed paper. Dunk each cookie into the chocolate and carefully remove using a fork. Carefully scrape the bottom of the fork against the side of the bowl to remove excess chocolate. Allow chocolate to drip off.

Refrigerate until chocolate has hardened, about 30 minutes. Keep cookies chilled until ready to serve.

Cookie Press Review


These cookies are simply incredible. A rich, chocolate cookie covered in an intense layer of bittersweet chocolate, I can't think of anything better. My tasters comments weren't audible over the ummms and ooohs. I'll take that as a good sign.

Cookie press rating: 5 cookies (out of 5). A perfect score!

February 28, 2010

Makin' Whoopie (Pies)


The snowy weather is getting me down. I'm lucky that I don't have to get out there with a shovel and strain my back lifting the heavy white stuff that seems to be falling every other day. Still though, putting on boots, a scarf, heavy jacket, gloves and a hat every time I go out is just plain tiresome. I long for the days when I can just go outside in a t-shirt and the only thing on my head is a pair of Ray Bans.

When the days are short and the weather is below freezing I love to make comfort food. But what's the equivalent of comfort food in terms of cookies? One could argue that all cookies are comfort food but I prefer to think there are some extra decadent cookies that get my endorphins going without the monotony of a treadmill. I think I found the ultimate comfort cookie in the Whoopie Pie.

Just the name puts a smile on my face. Whoopie! I did a google search and found an article in the N.Y. Times about the resurgence of the Whoopie Pie published just about this time last year. These cakey mounds of deliciousness are perfect with a tall glass of milk. The buttercream filling is so decadent it will make your blood vessels scream for a dose of Lipitor. But they are worth it. There will be time for exercise later, but for now, I'm all about the Whoopie Pie.

Whoopie Pies Recipe

I suggest making the pies a bit smaller since a few of mine came out very large and were difficult to handle. The mounds of batter spread in the oven, so be sure to leave enough room in between. Cool completely before filling with buttercream.

Instead of the suggested buttercream filling, I used a very simple recipe for buttercream as follows:

Simple Buttercream Filling


1/2 cup unsalted butter
2 cups powdered sugar
1 T milk
1 t vanilla extract
1/2 t salt

In the bowl of a mixer, beat softened butter on low speed until light and fluffy. Add powdered sugar and salt and continue mixing for about two minutes. Add vanilla and milk and continue mixing until light and fluffy. Scrape down sides of bowl. If the filling is too thick, add milk, 1 teaspoon at a time. If the filling is too thin, add powdered sugar one tablespoon at a time until desired consistency.

Let cookies cool completely before spreading a generous dollop of buttercream on one half and gently pressing another half on top. Store at room temperature for up to three days if they last that long.


Cookie Press Review
Wow. These are so decadent and delicious. I'm not even sure I would classify them as a cookie. These pies are more like the best cupcake I've ever had in my life. The sea salt adds just a hint of salty flavor while the chocolate cake combines with the buttercream to create a perfect storm of sweetness. This is one guilty pleasure in which I was glad to indulge.

Cookie press rating: 4 1/2 cookies (out of five)

February 9, 2010

Chocolate Dipped Shortbread Cookies


Valentine's Day is just a few days away and many of you are probably fretting over whether to buy flowers, chocolates or fine jewelry to celebrate this made-up holiday to fill the retail void between Christmas and Easter.

Ben Bernanke would probably not like me for saying this. But this year, why don't you just buy a card and make a nice home-cooked meal complete with a selection of home baked cookies? Skip trying to jump-start this dreadful economy and save some money for something important, like your cable bill.

I decided to make classic shortbread cookies to celebrate Valentine's Day. They're decadent and extra delicious when dipped in dark chocolate. I used Green & Black's organic dark chocolate with 85% cocoa content. The package reads "our darkest chocolate made with fine Trinitario cocoa beans." I'm not sure what a Trinitario cocoa bean is, but it sure sounds delicious. After dipping a bunch of cookies in chocolate I decided to channel my inner Jackson Pollock and drip chocolate as if I were creating a museum quality masterpiece.

This recipe is very easy to make. The most time-consuming part of making the cookies is chilling the dough before you roll it and again once the cookies are cut out.

Chocolate Dipped Shortbread Cookies

1 cup unsalted butter (2 sticks)
3/4 sifted confectioners sugar
1 t vanilla extract
2 cups sifted all-purpose flour
1/2 t salt
3 ounces semisweet or bittersweet chocolate, finely chopped
1 t canola oil or vegetable shortening

In the bowl of a mixer cream butter, sugar and vanilla until combined. On slow speed, beat in flour and salt until combined. Split dough in two pieces and wrap each tightly in plastic wrap and chill until firm (2 hours or overnight).

On a lightly floured surface, roll out the dough to a 1/8 inch thickness. Use heart-shaped cookie cutter to cut out shapes. Transfer cookies to an ungreased baking sheet. Chill for 30 minutes.

Heat oven to 300 degrees with rack in center of oven. Bake until just beginning to brown around the edges, around 16 minutes. Check after 10 minutes since baking time varies due to thickness of cookies.

Let rest on pan for 1 or 2 minutes before removing cookies to a wire rack. Cool completely.

Melt chocolate in a heat proof bowl over simmering water. A double boiler works best. Stir in the oil. When chocolate has cooled slightly, dip 1/3 to 1/2 of each cookie into the chocolate. Transfer cookies to wax paper or parchment and freeze for 10 minutes until chocolate hardens.

Cookie Press Review

I like everything about these cookies. They look festive without being gaudy, are easy to make, and even easier to eat. The bittersweet chocolate really makes this cookie a standout. Share them with your sweetheart and guarantee yourself a Happy Valentine's Day!

Cookie press rating: 4 cookies (out of five)

January 29, 2010

Chocolate Sparkle Cookies


One of my dedicated blog readers suggested, no insisted, that I try Chocolate Sparkle Cookies as another option to treating the symptoms of PMS (see Black Forest Cookie blog entry to understand the reference to PMS). This is the signature cookie of noted pastry chef Thomas Haas. Haas has worked as the Executive Pastry Chef at the Four Seasons in Vancouver, and as Executive Pastry Chef at Daniel, Boulud's famous eatery in Manhattan. Haas has won tons of accolades over the years so I'm thinking this cookies have to be fantastic.

Chocolate Sparkle Cookies

1/2 lb (8 oz.) bittersweet chocolate
3 T butter, room temp.
2 eggs
1 T honey
1/3 c sugar
3/4 c ground almonds
2 teaspoons cocoa powder
1 pinch salt
coarse sugar for garnish

Melt chocolate on top of a double boiler, over simmering water. Make sure water does not come in contact with the chocolate. Even a drop of water will seize the chocolate and you'll have to start over. Cut butter into small pieces and mix into the melted chocolate. Beat eggs with mixer, gradually adding the sugar and honey until light and mixture falls in thick, smooth ribbons from the beater (about 10 minutes). Fold into the chocolate-butter mixture. Add the cocoa powder and salt to the ground almonds and mix. Gently add to the chocolate mixture.

Cover and refrigerate overnight.

Preheat oven to 325 degrees. Line a baking sheet with parchment paper. Use a small ice cream scoop to form the dough into one inch balls. Working quickly, roll the balls in granulated sugar. Place on baking sheet about two inches apart. Bake for about 12 minutes, until the centers are moist, but not wet. Do not overbake. Cookies will be soft in the center. Cool slightly. Dust lightly with coarse sugar.

Cookie Press Review

These cookies did not impress. The texture was very odd. Soft? Yes. Chocolaty? You betcha. Sweet? No doubt. But I really couldn't get past the texture. Perhaps it was the ground up almonds which provided nice flavor but required some extra chewing and who has time for that? Be sure to have a glass of milk ready to wash 'em down. I also overcooked one batch on purpose to see if that made a difference. It didn't seem to matter all that much. Overcooking just dried them out.

My taste testers agreed and weren't begging for second or third sample as they normally do. A single cookie filled my tasters up.

I'd be interested to hear what you think of think of this cookie. For me, Sparkle Cookies were kind of lackluster.

Cookie Press rating: 2 cookies (out of five)

Reminder: Send me your cookie recipes to try! Email them to me at: tleader(@)nyc(dot)rr(dot)com.

January 21, 2010

Black Forest Cookies


My favorite cake is Black Forest. Wait! This is a cookie blog. Why on earth would I be writing about cake? Well, I love chocolate and cherries together so I decided to try a recipe I found in an old issue of Martha's Everyday Food for Black Forest Cookies. The recipe was very easy to follow. The only ingredient I didn't have on hand was the 1 1/2 cups of dried cherries which I picked up at the grocery store in the bulk items area. I find it strange that in today's high tech world that I still have to write the code for the cherries (407) on a round stickie label and affix it to the outside of the bag. Can't the grocery store manager invest in a scale which prints out bar codes? I digress. Back to the cookies.

There are three kinds of chocolate in the cookies which make them oh so delicious. Two tablespoons of cocoa powder. I used Hershey's which never disappoints. Next up was the 8 ounces of bittersweet or semi-sweet chocolate. I used Ghirardelli 60% cacao bittersweet chips (melted) which I think really make this cookie special. When I'm melting chocolate in a recipe, I generally use chips since they melt quickly and are usually cheaper than if I had bought the same amount of chocolate in bar form. We are in a recession and I'm on a budget. Finally, 12 ounces of chocolate chunks finished off the chocolate triple play. I used Hershey's semisweet chunks which worked well with the melted bittersweet chocolate.

Another thing I really liked about this recipe is that I didn't need to pull out and dirty my Kitchen Aid mixer. All of the ingredients mixed nicely in the double boiler I used to melt the chocolate and butter. The cookies baked nicely, but it was difficult to tell if they were actually browning or still in need of another minute or two in the oven. Let them cool on the sheets for at least two minutes before moving them to cooling racks since they will be brittle.

The result was chocolate perfection! Soft, luscious, and super chocolaty. The cherries provide a wonderful contrast to the rich chocolate. You could probably use dried cranberries instead, however, I recommend you stick to the recipe and use cherries. Next time, I may try to incorporate marshmallows into the batter or spoon a dab of marshmallow fluff on the top of each just before baking.

I took some into work and shared them with two of my co-workers, Sheryl and Marissa. We share an office so it's not hard to notice when either (or both, in this case) are having a bad day. I took out the cookies, shared them and immediately the tense feeling lifted like a plane rising above the clouds into a sunny sky. The cookies were deemed the "ultimate PMS solution". Watch out Pamprin, there's a new kid in town.

Happy baking!