May 6, 2011

Perfect Chocolate Chip Cookies


Behold, the perfect chocolate chip cookie! Does one even really exist? Some people like thick and chewy cookies while others prefer thin and crispy cookies. Whichever you prefer, the folks at Cook's Illustrated claim they have created the perfect chocolate chip cookie-one with a crisp outside and a soft inside and a deep butterscotch flavor. In case you haven't notices, I'm by nature and name a doubting Thomas. I just had to find out for myself if the experts were stretching the truth just a bit.

I decided to follow the recipe exactly as written and see what happens. After all, that's why I write this blog, isn't it?

Find the complete recipe here, at Cook's Illustrated's website.

I started by measuring all of the ingredients, or "mis en place" as the professionals say. When translated, mis en place loosely means to put in place or make ready. I measured the flour as I always do, by lightly spooning it into a measuring cup and using the back of a butter knife to scrape off the excess. I then weighed the flour and found that I was tad on the scant side. The recipe calls for 1 3/4 cups or 8 3/4 ounces of flour. I was coming up short with just under 8 ounces. I added more flour to the scale until it read 8 3/4 ounces which turned out to be 2 cups plus 2 tablespoons.

Mise en place


With ingredients neatly measured out I was ready to get down to brass tacks by putting it all together. The recipe instructed me to heat 10 tablespoons of butter over medium-high heat until until it melts and turns a dark, nutty brown.


With the butter melting on top of the stove, I decided it was a good time to toast the walnuts. My oven was preheated so I tossed the nuts onto a rimmed cookie sheet and popped them into the oven for about five minutes. Talk about multi-tasking. I felt like a juggler in my own kitchen circus. Viola! Like magic, the butter darkened as I swirled the pan. Luckily I stopped the browning process before the butter burned.

I'm really liking this recipe, I thought. I added 4 additional tablespoons of butter to the browned butter and once melted, I added the sugars, salt, and vanilla. Next came the egg and egg yolk and then I whisked it all together. The aroma was heavenly. It looked and smelled just like homemade caramel-smooth, rich, and decadent. I couldn't wait to dive in to the batter with a spoon but I restrained myself. I added the flour next as the recipe directed and then the chocolate chips and the toasted nuts.

Ready for the Oven


Baked and Ready to Cool


I couldn't wait to try these large, perfectly shaped, picture perfect cookies. Would they truly be the best chocolate chip cookie EVER? I poured a tall glass of milk and broke apart one for closer inspection. The nut to chip to cookie ratio was excellent. I hate an unbalanced cookie! I bit in and savored the flavor. Wow, these cookies were amazing. With a rich, buttery, chocolate flavor these cookies are-dare I say it-are as close to perfect as perfect can be. Try the recipe for yourself. I already hear you making the yum noise as you reach for seconds.

Cookie press rating: 5 cookies (out of 5)

April 21, 2011

Hamantaschen


Hamantaschen are pastry-like, triangle-shaped, cookies that are popular this time of year. Traditionally eaten during the Jewish holiday of Purim, hamantaschen are formed by rolling the dough, cutting circles with a round cookie cutter, filling them with any one of a number of delicious fillings (poppy seed, apricot, or raspberry) and folding the circles into triangles. Does it sound difficult? It's really not. Don't let the multi-step process mess with your head. Let's make hamantaschen. I'll walk you through the process every step of the way. I promise.

Hamataschen
This recipe is adapted from Carole Walter's Great Cookies cookbook.

Ingredients:
3 cups all-purpose flour
1 cup sugar
2 teaspoons baking powder
1/4 teaspoon salt
1 1/3 sticks cold, unsalted butter cut into 1/2 inch cubes
2 eggs
2 egg yolks
1 teaspoon vanilla extract
2 cans Solo filling (I used poppy seed and apricot)

Egg Wash
2 large egg whites
2 teaspoons sugar

Lightly beat the egg whites with the sugar until well blended and sugar has dissolved.

Step 1:
Make the Dough
Place the flour, sugar, baking powder, and salt into the bowl of a food processor. Pulse two or three times to combine. [If you don't own a food processor, whisk ingredients together in a large bowl.]

Add butter and pulse five times. Process 5 seconds longer to form a sand-like consistency. [Or add butter to the bowl and break up butter pieces with your fingers while incorporating the butter into the flour. Keep pulling flour from the bottom of the bowl to thoroughly mix as if you were making pie dough.]


Place the eggs, egg yolks, and vanilla into a small bowl and mix with a fork to combine. Pour mixture into the processor and pulse four or five times, then process until the dough comes together. [or add the eggs, egg yolks and vanilla and gently mix with a spoon until the dough forms] Be careful not to over process the dough. Pour dough onto lightly floured work surface and form two disks, roughly the same size. Flour hands as needed if dough is sticky. Wrap disks individually in plastic wrap and refrigerate for at least 1 hour or for up to 3 days.


Step 2:
Roll the Dough

Line two or three baking sheets with parchment paper and heat the oven to 350 degrees. Roll dough on a flat surface or on a pastry cloth to a 3/16 inch thickness. Use flour as needed to prevent sticking.

Using a 3-inch round cookie cutter, cut circles of dough and place them on cookie sheets. If you don't have a 3-inch cookie cutter, substitute the top edge of a drinking glass or cut a 3-inch piece of cardboard and use a paring knife to cut circles. You may collect scraps and roll them once more. Try not to over handle the dough which will make your cookies tough.

Step 3:
Fill the Cookies
Spoon 1 1/2 teaspoons of filling onto each piece of dough. Then brush the perimeter of each circle with the egg wash. Lift dough to partially cover the filling, creating a triangle shape. The easiest way I found to do this was to use my two thumbs to lift dough from the bottom edge. Then use your index fingers on each hand to gently lift the dough at the 10 o'clock and 2 o'clock positions. Pinch corners together to form a triangle and bush dough with egg wash.


Step 4:
Bake (you're almost home)

Bake cookies for 15 to 18 minutes, or until cookies are golden brown. If baking two pans at a time, rotate sheets from top to bottom and front to back midway through baking. Remove from oven and let cool on cookie sheets for 2 to 3 minutes. Transfer cookies to wire racks and let cool completely.

Step 5:
Pat yourself on the back or get someone to do it for you. You've just made a delicious batch of hamantaschen!

Store cookies in an airtight container at room temperature for up to 5 days. You may also freeze them.

April 18, 2011

Cookie Press Press

The Cookie Press got some press of its own a few months back when a friend and former colleague wrote about me sending him some cookies to show my gratitude. Josh's blog, Scribble Scribble is about everything, and nothing. It's kind of like the first line of A Tale of Two Cities. "It was the best of times, it was the worst of times ..." Basically, I'm not sure what his blog is about. I guess you could say it's about Josh's random thoughts on life.

For all you can lovers, Josh posts pictures of cats on his blog on Fridays. I'm sure he'd love to post your beloved cat pictures (no dogs). Send photos to joshwimmer@gmail.com.

To read what Josh had to say about his Cookie Press cookies, click on ...

http://www.scribblescribblescribble.com/blog/2011/01/props-to-the-cookie-press/

April 15, 2011

Chocolate Tuiles


This week I decided to try a new type of cookie that I have never done before. Feeling adventurous, I headed to the kitchen and prepped the ingredients to make tuiles. For all you non-Francophiles, tuiles is pronounced "tweel." If you've never had a tuiles, you're in for a treat. These ultra-thin cookies are crispy and packed with flavor. After you eat a few you almost forget they are cookies. I started thinking they were potato chips. Traditionally the edges turn up slightly (much like the nose of a Frenchman as he gently sniffs the aroma of a fine wine). Luckily the curled edges aren't essential to the taste because I failed miserably when I tried to curl the piping hot cookies without burning my fingers. After a few tries I just gave up. However, I did manage 1 or 2 that looked decent. Oh, and don't try to underbake them thinking that would make them easier to roll. It doesn't and you just end up with a mess and a greater sense of frustration and failure.

There are many great variations on tuiles in a book called Chewy Gooey Crispy Crunchy Melt-in-Your Mouth Cookies.

Cocoa Tuiles

4 tablespoons butter, melted and still very warm, plus extra for greasing pan liners
1/2 cup sugar
1/4 cup natural cocoa powder (Hershey's will work perfectly)
1/8 teaspoon salt
2 large egg whites
1 tablespoon plus 1 teaspoon all-purpose flour

Preheat oven to 350 degrees. Position racks in the upper and lower thirds of the oven or in the middle if you plan to bake only one tray at a time.

Line baking sheets with heavy duty foil, dull side up

Whisk together melted butter, sugar, cocoa and salt. Whisk in egg whites. Add flour and whisk only until combined. Let rest 10 minutes or cover and refrigerate for up to 3 days.

Drop level teaspoonfuls of batter about 3 inches apart onto the prepared cookie sheets. Using a small offset spatula or back of a spoon, spread the batter evenly into 3 inch rounds, about 1/16 inch thick.

Bake, watching carefully for 10 - 12 minutes, until the edges are slightly darker than the rest of the cookie. If baking 2 pans, rotate from top to bottom and front to back midway through baking time. It's important to bake cookies thoroughly or they will not be crispy when cooled.

Store cookies in an airtight container for up to 1 month but I can assure you they will last only a few days at the very most.

If you're interested in learning how to shape the cookies, you may want pick up the book I mentioned above by author Alice Medrich.

As cookies came out of the oven I sprinkled them with sea salt which was just enough to give them a wonderful salty/sweet taste.

I would love to hear from you about your attempts to curl the edges. Let me know if you were successful.

Cookie Press Rating: 3.5 (out of 5)

April 6, 2011

Fresh Baked Cookies Anytime


It's so easy to produce fresh baked cookies on a whim if you just take a few minutes to prepare ahead of time.

Make a batch of drop cookies such as chocolate chip, sugar, or gingersnaps as directed in the recipe. Then instead of baking, shape into balls and place on a baking sheet and freeze for 1 hour. Store in plastic bags in the freezer. Be sure to label the bags with the name of the cookie and date. Store for up to 3 months in double-wrapped plastic freezer bags.

Baker's Tip: Also label the bag with the baking instructions (15 min. @ 350 degrees). You won't need to search for the recipe when it's time to bake.

Remove the cookies and let thaw for about fifteen minutes while the oven warms. You may need to add 1 or 2 minutes to the baking time to account for the partially frozen cookies.


Ready for the Freezer


I made these pecan sandies which freeze well and are easy to make.

Pecan Sandies

1 stick unsalted butter, softened
1/2 cup packed light-brown sugar
1 1/2 teaspoons vanilla extract
1/4 teaspoon salt
1 cup all-purpose flour
1 cup pecans, medium chopped

Beat butter and sugar together using an electric mixer until light and fluffy. Add vanilla and salt. Mix until incorporated. With mixer on low, add flour, beating until just combined. Remove bowl from mixer and add pecans, gently folding them into the dough.

Roll dough into 1 1/2 inch balls and place on two baking sheets. Freeze as directed above or bake immediately. Gently flatten each ball with the bottom of a damp glass (to avoid sticking).

Heat oven to 350 degrees.
Bake until cookies are golden brown, 15 - 17 minutes, rotating sheets halfway through.
Transfer to wire racks to cool. Store in an airtight container at room temperature for up to 5 days.

March 30, 2011

Peanut Butter Sandwich Cookies


I used to love Nutter Butters as a kid. When I was allowed to choose a cookie in the supermarket, I almost always chose the peanut-shaped, peanut butter filled, crunchy cookies. I sometimes dipped them into a glass of milk. If I was feeling destructive, I would split them and carefully lick the filling. Other times I would just inhale them and then try to remember what they tasted like. I was pretty normal as a child.

I was wondering if I could recreate these in my own kitchen so I found a recipe for Peanut Butter Sandwich Cookies and got right to work.

This recipe makes a nice, softer version of the original Nutter Butter. I didn't bother to try to shape them like a peanut or to make a faux peanut shell on the outside of the cookie. No, I'll leave that to the folks at Nabisco.

Truth be told, these aren't much like Nutter Butters at all. I guess some childhood memories aren't meant to be copied in the kitchen. The next time I'm in the cookie aisle I'll pick up a package, sit myself down at the kitchen table, pour a tall glass of milk and try to relive some childhood memories.

Baker's Tip: Allow at least an hour of freeze time before you try to slice the cookie dough. Reshape the sliced cookies as needed so they retain their rectangular shape. And try not to eat too much dough as you go!

Ready for the Oven


The recipe is from a past issue of Everyday Food, a Martha Stewart production.

Peanut Butter Sandwich Cookies

1/2 teaspoon baking soda
1/4 teaspoon salt
2 cups plus 2 tablespoons all-purpose flour
1 stick unsalted butter, softened
1 cup lightly packed light brown sugar
1 1/2 cups smooth peanut butter
1 large egg
1/2 cup whole milk
1/2 cup sugar

In a small bowl, whisk together baking soda, salt, and 2 cups flour. Set aside.
I a large bowl of an electric mixer, beat butter, brown sugar, and 1 cup of peanut butter until light and fluffy. Bean in egg. With mixer on low speed, gradually add flour mixture and beat until just combined.

Form dough into two 8-inch long rectangular logs. Wrap each log in plastic wrap and freeze until firm, about 1 hour.

Preheat oven to 350. With a sharp knife, slice dough 1/4 inch thick and place on baking sheets approximately 1 inch apart. Turn dough and reshape as needed while slicing the cookies so that they retain their shape. Bake until cookies are puffed, about 12 to 15 minutes, rotating sheets halfway if baking two at a time.
Transfer to wire racks to cool.

Filling: In a saucepan, whisk milk, and 2 tablespoons flour over medium heat until thickened, about 2 minutes. Let cool. In a mixing bowl, beat together 1/2 cup peanut butter and granulated sugar. Beat in cooled milk mixture.

Assemble Cookies: Spread smooth sides (bottoms) of half the cookies with 1 tablespoon filling. Sandwich with remaining cookies.

These cookies are best eaten within a day or two but will store in an airtight container at room temperature for 5 days.

Cookie press rating: 3 cookies (out of 5)

March 11, 2011

Cowgirl Cookie Party


My friend Wendy came to me a few months ago to ask if I would help create a cookie party for her daughter Madeline's 6th birthday. I jumped on board with the plan since I thought it is high time cookies take the spotlight at birthday parties. Who needs the dry old cake with super sweet icing. It's time for a cookie party revolution! And I thought it would be fun, which it definitely was.

Wendy and I met a for lunch a few times to plan the party. First up we need to find space to accommodate our group of 17, six year olds and their parents. In case you weren't aware, it's tough to plan kid parties in New York unless you have oodles of money to rent party space and/or lots of space in your apartment. Creative and resourceful Wendy found a great party place, Cowgirl, a West Village restaurant staple for as long as I can remember. The decor is totally hoe down kitsch with western-themed tchotchkes on the walls. Their party room was perfect for hosting our crowd of 30 and the staff couldn't have been any nicer.


The Plan

Now with a western theme under way, Wendy readied the e-invitations and I got to work on the supplies. First, I hit one of my favorite cooking/baking supply stores in the city, Broadway Panhandler, which oddly is not located on Broadway (it used to be). I picked up three cookie cutters-a boot, a horse, and a cacti. Two days before the party I made about 35 cutouts and used my letters to create cookies to spell out Happy Birthday!

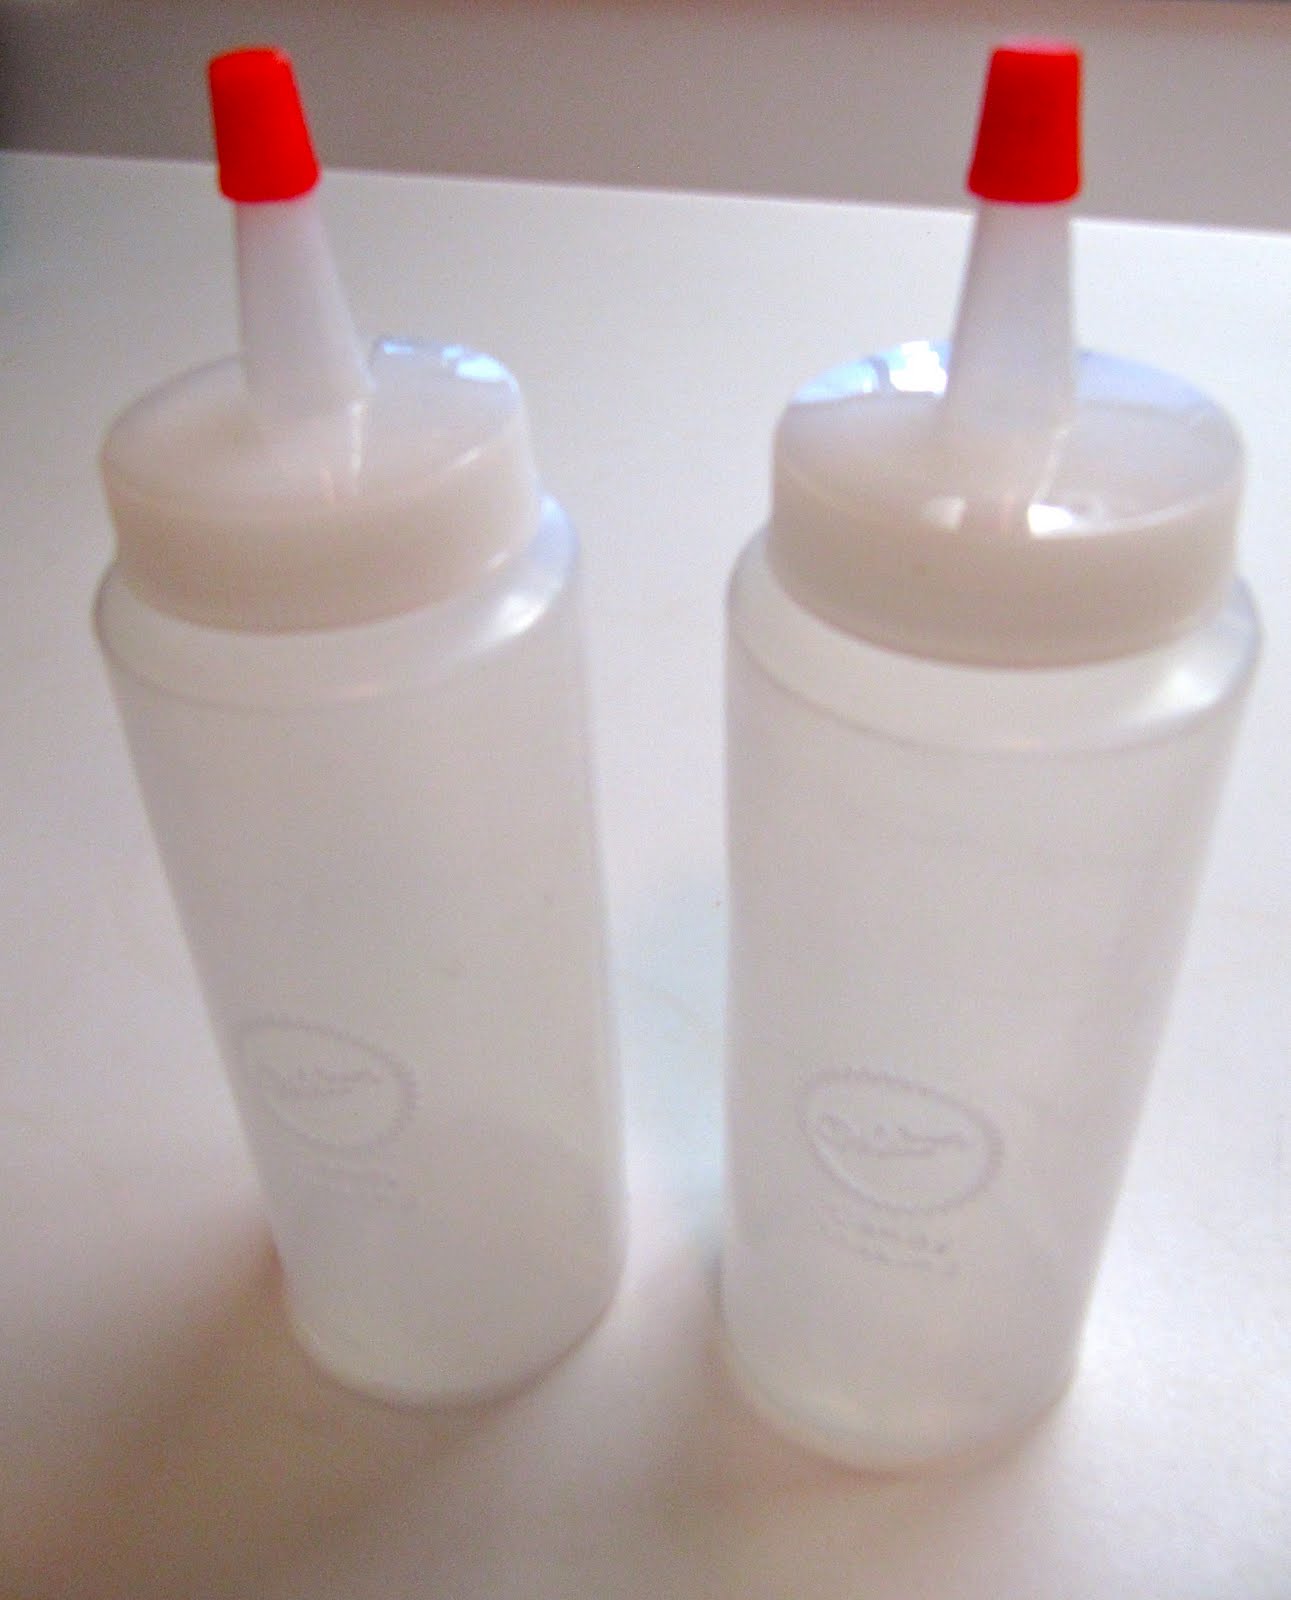
On the day of the party we set up cookie decorating work stations at a long table. Each station contained a placemat, paper plate, and cookies. The center of the table was lined with squeeze bottles filled with brightly colored royal icing so the kids could easily grab the colors they liked. I made sure the icing was on the runny side so that it oozed out of the bottles (just a tad thicker than the consistency of white glue). We also included cupcake wrappers filled with various colored sprinkles and toppings placed along the center of the table within easy reach for short arms.


The kids had a ball decorating cookies! Some kids carefully dotted the cookies with icing while others just poured it on like they were putting maple syrup on pancakes. Whatever the technique, the creations were unique, colorful, and delicious. We wrote each child's name on the bottom of their paper plate and moved the plates to quiet corner of the room to dry while lunch was served. The icing hardened fairly quickly in time for us to place the cookies in cellophane bags as a take away. Wendy also provided gift bags with toys and nifty items. One of the dads entertained the posse with balloon twisty sculptures. A pinata took a beating before it ruptured, spilling its sweet guts all over the floor.

The whole party was two hours. Just long enough to get in all of the action on a cold winter day in the city.


Create Your Own Cookie Party

Here's a list of what you'll need:

cookie cutters (medium size)
sugar cookie dough (2 or 3 batches depending on how many cookie decorators you have)
cupcake wrappers (foil wrappers work best)
plastic squeeze tubes - enough for each child to have one to start (available from Michael's Crafts or by Wilton baking products)
paper plates
table covering for easy cleanup
cellophane bags with ties or ribbon to close
stick on tags to label bags

Two or three days in advance, make cookie dough and refrigerate. One day before roll the dough, bake cookies and store them in an airtight container at room temperature.

Sugar Cookie Cut Outs

2 cups flour
2 teaspoons baking powder
3/4 teaspoon salt
1 cup granulated sugar
1 egg
1/2 cup butter (1 stick) softened
1 teaspoon vanilla

Sift the flour, baking powder and salt together and set aside.
Cream butter and sugar together in a mixer until light and fluffy.
Add the egg and vanilla, mix well.

Add dry ingredients and mix on low speed until ingredients come together.
Do not over mix.

Roll out dough until between 1/8 and 1/4 inch thick, cut into shapes and transfer to parchment-lined cookie sheets. Bake at 375 degrees for 8 to 10 minutes until lightly browned around the edges. Let cookies cool on try for about a minute and remove to wire racks to finish cooling.

Royal Icing
2 large egg whites
1 pound confectioners' sugar
food coloring or gel paste, which is more concentrated.
warm water as needed (add by the teaspoon) to achieve desired consistency

Beat egg whites, sugar, and 2 teaspoons water on low speed for 10 minutes. For thicker icing continue to beat 2 or 3 minutes more. Transfer to smaller bowls and add food coloring as desired. If icing is too thick, add a drop or two of water to thin. Immediately spoon into plastic bottles and securely fasten with lids. Do not expose icing to the air as it will harden. Royal icing will keep in the fridge for a few days so you can make this ahead.


On party day, set up each child's workstation with a few cookies on a plate, and decorating items like sprinkles. If children are older, you may want to provide offset spatulas or butter knifes to assist in decorating.

My advice is to keep it simple and just have fun!

And Happy 6th Birthday Madeline!


March 2, 2011

Crispy Cocoa-Walnut Ice Cream Sandwich Cookies


Many of you may be wondering where I've been for the last month or so since my last post back in late January. My life has been consumed by the stressful process of moving. Well, not just moving, but the whole real estate buying process in general. Moving in and of itself is stressful. Add that to a city co-op real estate transaction and it's enough to make anyone start taking Xanax. But all that's behind me and all that's left is unpacking a few boxes and deciding where to hang pictures. The fun stuff.

Needless to say, I haven't had much time to bake and I am going through withdrawals. Kind of like Charlie Sheen these days. Frankly, I'm a little scared to bake in my new oven. It's fairly old and so far the temperature dial is only a mere suggestion of what the inside heat might be. I stress the word MIGHT. Last night I made a meatloaf and set the oven for 350 degrees. About 30 minutes in I checked and the oven thermometer inside was 400! Luckily, I have a window next to the oven so when I do burn something I just open the window and wave the smoke out.

A few weeks before the move I made a special treat for Valentine's Day. Crispy Cocoa-Walnut Cookies admirably served as the outer shell enveloping creamy vanilla ice cream. Topped with chocolate sauce, this dessert was a magnificent ending to a merely average dinner.

Feel free to make these any time of the year. Summer would be an ideal time. Or now. How about right now? Who can resist an ice cream cookie sandwich? No one that I know.

The cookie recipe is courtesy of bon appétit's February issue. The ice cream part was my idea. I substituted walnuts for pecans but you can use any nuts. I think hazelnuts would be an excellent choice.


Crispy Cocoa-Pecan (Walnut) Cookies


1 1/2 cups all-purpose flour
3 tablespoons natural unsweetened cocoa powder (scooped, then leveled)
1/2 teaspoon baking soda
10 tablespoons (1 1/4 sticks) unsalted butter, melted and cooled
1/3 cup (lightly packed) brown sugar
1/3 cup sugar
2 tablespoons plus 2 teaspoons light corn syrup
2 tablespoons whole milk
1 teaspoon vanilla extract
1 cup chopped nuts (pecans or walnuts)
1/2 cup bittersweet chocolate chips

Whisk flour, cocoa, baking soda, and 1/2 teaspoon salt in a medium bowl. Stir butter, brown sugar, sugar, corn syrup, milk, and vanilla in another medium bowl until smooth. Stir in the flour mixture, then nuts. Cover and chill until firm, about 4 hours or overnight.

Position 1 rack in the top third and 1 rack in the bottom third of the oven and preheat to 325 degrees.

Line 3 large baking sheets with parchment. Measure 2 level tablespoons dough and roll between palms into a ball. Place on prepared baking sheet. Using the palm of your hand, gently press the dough onto the cookie sheet to form a 3-inch diameter disk. Repeat with remaining dough, spacing 5 inches apart.

Bake cookies 8 minutes, reverse sheets. Continue baking until cookies are flat and beginning to darken around the edges, about 10 more minutes. Transfer cookies on parchment paper to rack. Cookies will crisp while they cool.

Store cookies in an airtight container at room temperature.

Form Ice Cream Sandwiches

Let ice cream soften for 5 minutes or so. Scoop one generous portion of vanilla ice cream onto the bottom of one cookie and then place another cookie on top, pressing gently. Remove any excess ice cream by gently scraping the sides of the cookie with a spatula. Top with melted bittersweet chocolate and serve immediately. Or place on cookie sheet and return sandwiches to the freezer until ice cream has hardened and chocolate has set. Wrap tightly in plastic wrap. Best eaten within 5 days.

Cookie Press Rating: 4 cookies (out of 5)

January 29, 2011

Happy Anniversary Cookie Press!


Did you ever miss your anniversary? Be honest. I'm sure there was one year when you woke up in the morning and completely forgot about it. Perhaps something during the day reminded you of the special day. Perhaps your spouse gently hinted until you got the message. Or perhaps you didn't remember at all until you were unceremoniously reminded by the one you love. Well, which is it?

A few weeks ago I let a very special day go by unnoticed. The Cookie Press celebrated its one year anniversary on January 20. And I missed it. Perhaps it was a snowy day and my brain froze. Or perhaps I was just busy with other things. C'est la vie.

The blog has been a wonderful way to express my creativity in the kitchen and online as well. I've loved sharing my successes like Penguin Cutouts and even my disappointments like Lemon-Zucchini Cornmeal Cookies (bleck!). Above all, I've loved receiving comments from relatives, friends, and friends of friends. It's gratifying to know people are out there reading even if they aren't trying every single recipe I post.

If you're a Twitter user and aren't following the Cookie Press, shame on you. Start following @CookiePress right now. We also have a FaceBook Fan Page. I know they're called business pages now, but I prefer to use the former term. Search for "Cookie Press" on FaceBook and then click "like" to start following. I encourage everyone to upload pictures, post recipes, and join the cookie conversation.

You may have noticed that the number of postings has diminished over the last few weeks and there's a reason for it. My partner and I will be moving soon and I've been consumed with the mountains of paperwork needed these days to get financing and Co-op board approval. Thankfully both approvals are behind us and all that's left is signing about a thousand documents and packing and unpacking boxes. We're looking forward to the new adventures we'll find in Riverdale, just north of Manhattan.

I'm looking forward also to another delicious year of making and nibbling on cookies! That's all for now. I've got a batch in the oven right now and I think they're burning!

January 21, 2011

Hazelnut Crinkle Cookies


Hazelnuts are high in protein and relatively low in fat as compared to other nuts. Also known as Filberts, these babies have tons of fiber, iron, phosphorus, vitamins B1, B2, C, and E, folate, and other essential nutrients. They are the champion of nut family, contributing to lower cholesterol levels. Just think of what a daily dose of hazelnuts combined with a statin like Lipitor would do to lower your cholesterol.

Plus, did I mention they taste delicious to boot? That is, if you're not allergic.

As in life, with the good comes the bad. Hazelnuts have a skin which can be difficult (and messy) to remove. Perhaps that's why they're not as popular as walnuts or pecans (just a theory).

I'll be honest. These cookies took time to make. Most of it was spent removing the skins after a boiling, washing, and drying process which I'll describe later. That said, if you can find blanched hazelnuts, buy them. My local Wholefoods did not have them, so I was stuck spending nearly an hour trying to get the tough skins removed.

I tried a new method of removing skins and it worked well. The traditional way involves roasting the nuts in a 350 degree oven for about 10 minutes and then placing the nuts in a dish towel and rubbing the heck out of them until the skins come off. The new way is easier. Bring a quart of water to a boil in a saucepan and add 4 tablespoons of baking soda. Turn down the head to avoid a messy boil over and continue boiling for 3 - 4 minutes. Drain nuts in a colander and then rinse under cold water. Rub between your palms under the water and skins will come off easily. Dry on paper towels and roast in the oven as described above. Nuts may take longer to toast depending on how much water they absorbed.

Chop nuts by hand with a chef's knife or place in a food processor being careful not to chop nuts into a fine powder. You want to retain the texture.

Skinned and Toasted Hazelnuts Ready for Chopping


Hazelnut Crinkle Cookies
(adapted from Better Homes & Gardens, November 1995 issue)

3 cups all-purpose flour
2 teaspoons baking powder
1/2 teaspoon salt
1 11 ounce jar of chocolate hazelnut spread (Nutella or similar)
1/4 cup shortening
1 1/3 cups sugar
1 teaspoon vanilla
2 eggs
1/3 cup whole milk
1/2 cup chopped, toasted hazelnuts (see above for toasting instructions)
Additional finely chopped hazelnuts (about 1 1/2 cups)
Confectioners sugar for rolling and dusting

In a medium mixing bowl combine flour, baking powder, and salt. Set aside.

In a large mixing bowl combine chocolate-hazelnut spread and shortening. Beat with an electric mixer on medium speed until combined. Add sugar and beat until fluffy. Add vanilla and egg. Beat until combined.

Alternately add flour mixture and milk to creamed mixture, beating on medium speed until just combined. Stir in 1/2 cup chopped hazelnuts. Cover and chill for about 2 hours until firm.

Preheat oven to 375 degrees.

Shape dough into 1 or 1 1/2 balls. Roll in finely chopped hazelnuts and then in confectioners sugar. Place balls 2 inches apart on a lightly greased cookie sheet or on parchment paper.

Bake at 375 degrees for 8 to 10 minutes until surface is cracked and cookies are set. Cool on wire rack. When cool dust in confectioners sugar again and store in an airtight container at room temperature. Makes approximately 6 dozen cookies.

Cookie Press Review:
These cookies are bursting with hazelnut flavor and are a nice change from other chocolate and nutty cookies. The texture is light, with a soft and chewy center. Perfect with tea or a glass of milk, these cookies get my seal of approval. They would be great to include in a holiday cookie assortment or to be devoured at any time during the year.

Cookie Press rating: 4 cookies (out of 5)

January 11, 2011

Let it Snow!


Another winter storm is headed toward New York. Our third big winter blast of the year. Enough already I tell you! Instead of moping around the apartment and cursing the weather I've decided to embrace it. And what better way to do it than with Snowflake Cookies. I made these a few weeks ago as part of my holiday baking extravaganza and remembered to take a few photos so that I could share later.

The cookie itself is my mom's famous sugar cookie cutout recipe. It yields a flavorful, sturdy cookie with a tender crumb. I decorated the cookies with royal icing applied to the cookie using a simple plastic squeeze bottle which are available in craft stores. I found mine at Bed, Bath & Beyond.

To decorate, hold the cookie in one hand and swirl the icing onto the cookie with the squeeze bottle, making sure to touch the cookie with the tip of the bottle. Have fun with it. I decorated the cookies with white sanding sugar to give them a glisten. I also made stars at the same time. For the stars, I iced the whole cookie and finished it with sanding sugar.

Christmas Cookie Cut Outs

2 cups flour
2 teaspoons baking powder
3/4 teaspoon salt
1 cup white sugar
1 egg
1/2 cup butter (1 stick)
1 teaspoon vanilla

Sift the flour, baking powder and salt together and set aside.
Cream butter and sugar together in a mixer until light and fluffy.
Add the egg and vanilla, mix well.
Add dry ingredients and mix until ingredients come together. Do not over mix.

Roll out dough until 1/8 inch thick, cut into shapes and transfer to parchment-lined cookie sheets. Bake at 375 degrees for 8 to 10 minutes until lightly browned around the edges. Let cookies cool on try for about a minute and remove to wire racks to finish cooling.

Decorate with royal icing.

Royal Icing
2 large egg whites
1 pound confectioners' sugar
food coloring and/or sanding sugar

Beat egg whites, sugar, and 2 t water on low speed for 10 minutes. For thicker icing continue to beat 2 or 3 minutes more. Transfer to smaller bowls and add food coloring as desired. If icing is too thick, add a drop or two of water to thin. Keep icing covered with plastic wrap when not using to avoid hardening.

Stars and Snowflake


Squeeze Bottles

December 30, 2010

Happy New Year!


I can't believe that we have just one day left in 2010! Seems like just yesterday we were ushering in a new decade and now we're on to 2011. And next year I'll be saying the same thing. Where does the time go?

This year for Christmas Eve dinner at my Aunt's home I wanted to bring a special dessert. I came across a page I had clipped from Martha Stewart Living magazine last year. She featured her take on a traditional French dessert, the croquembouche. It's not a gut-busting dessert (unless you decide to eat the whole thing!) but luckily, I wasn't the only one bringing dessert for the eight of us. I especially liked Martha's version because it is decorated with star cut-out cookies!

The words croque en bouche translate to mean "crunch in the mouth." It is made of about 50 puffs filled with a caramel cream and dipped in a thin caramel sugar that hardens when cooled. The result is crunchy, sweet, and soft all in a single bite. The puffs are assembled into a cone-shaped form and then decorated with the cookie stars or more traditionally, spun sugar.

I made the croquembouche over three days starting first with the sugar cookies. I used a basic sugar cookie recipe and cut out various stars in several sizes. I happened to have a tiny star cutter that came as part of a set used to make Linzer Torte cookies. It was perfect to create the tiny stars. I decorated the cookies with white royal icing and dusted them with white sanding sugar for some sparkle.

I've made cream puffs before so making the puffs wasn't too much of a hassle. I dusted off my pastry bag with a 1/4 inch tip and whipped out about 75 puffs fairly quickly. Then I made the caramel by melting sugar in a saucepan, adding 1 cup of heavy cream, and returning the mixture to a boil. Finally, I added creme fraiche, vanilla, and salt and let it cool overnight in the refrigerator.

The final steps involved making a light caramel sauce and carefully dipping the filled puffs into the scalding sauce without burning my fingers. After the tops are dipped and have cooled, I repeated the process this time dipping the bottoms and assembling the final cone-shaped masterpiece. In the final step, I added the decorated stars by affixing them with a dab of royal icing. Don't worry, it's not as difficult as it sounds!

For me, the best part of the whole process came when I was transporting the croquembouche down to the car. The elevator door opened on my floor and I strolled in holding the festive dessert in the palm of my hand. The couple on the elevator immediately stopped their conversation to marvel at the croquembouche and asked me if I had made it. When I answered that I had, the gentlemen replied with an accent, "the whole thing?"

"All of it," I said.

It took me a moment to realize that the couple on the elevator were French!
I didn't need to tell them what it was since they obviously knew. We chatted the rest of the way down and though the lobby. I think I may have possibly just made their entire day. I know they made mine.

Instead of typing the entire recipe out, I've included a link to Martha's website where you can print out the recipe. I also found a video online of Martha making a croquembouche with special show guest, Rachel Maddow. It was a bit strange to hear Martha and Rachel talk politics while dipping puffs into caramel!


Happy New Year! I look forward to bringing you more fabulous cookie recipes in 2011 as the blog turns one year old!

December 28, 2010

Caramel Pecan Cookies


Last week's entry for Brownie Squares yielded some interesting comments from readers. My friend Lisa said, "This looks so good I may get the apron out tonight." And my friend Myra said, "OMG! These look incredible!! :-)." I love that Myra included a smiley face with her comment.

Today I think I'll share another recipe using the same butter cookie base but adding caramel and pecans on the top. If you like sweet and gooey caramel, these cookies are TDF (to die for). I've made them every year for the past five years. I shared the recipe with my mom and she has been known to make them throughout the year.

If you have never made caramel before it's not too difficult but you do need to pay attention to what you're doing so that you don't burn yourself or your house down. Caramel is made by melting sugar, adding heavy cream, cooking until the caramel is smooth, and finally adding butter, vanilla, and salt. Be careful when adding the cream, as the melted sugar will bubble and steam vigorously. Make sure to use a 3 quart saucepan to avoid a catastrophic boil over.

Basic Butter Cookies

2 cups all-purpose flour
1/2 teaspoon baking powder
1/2 teaspoon salt
1 1/2 sticks (3/4 cup) unsalted butter, softened
1 cup sugar
1 large egg
1/2 teaspoon vanilla

Whisk together flour, baking powder, and salt in a small bowl.

Beat together butter and sugar in a large bowl with an electric mixer at medium-high speed until pale and fluffy, about 3 - 4 minutes. Beat in egg and vanilla. Reduce speed to low, add flour mixture and mix until just combined.

Grease a 9 x 13 inch metal baking pan, then line with foil, leaving a 2-inch overhang on both ends. Then grease foil.

Press dough evenly into bottom of baking pan, using plastic wrap or wax paper on top to keep dough from sticking to your fingers. Chill until firm, about 20 minutes.

As crust chills, preheat oven to 375 degrees.

Bake crust until golden brown, about 20 - 25 minutes. Do not over bake. Remove from oven and cool on wire rack for 20 minutes. Leave oven on.

While crust cools, make the caramel topping.


Caramel Pecan Topping


1 1/2 cups sugar
1 cup heavy cream
3/4 stick (6 tablespoons) unsalted butter cut into bits
1 teaspoon vanilla
1/2 teaspoon salt
2 cups pecans, toasted, cooled, and coarsely chopped

Make topping while crust cools:
Cook sugar in a 3 quart heavy saucepan over moderate heat, undisturbed, until it begins to melt. Continue to cook, stirring occasionally with a fork, until sugar is melted to a deep golden caramel. Be careful not to burn. Tilt pan and carefully pour in cream. Sugar will harden and steam vigorously so be careful. Place back on burner and continue cooking over moderately low heat, stirring, until caramel is smooth. Increase heat as needed if caramel is not yet smooth after 2 - 3 minutes. Remove from heat and stir in butter, vanilla, salt, and pecans.

Immediately spread topping over cooled crust and bake until bubbling, about 20 minutes. Remove from oven and cool on a wire rack for about 2 hours.

Lift cookies out of pan by gently loosening and lifting the foil. Place on large cutting board and remove foil. Run a knife (chef's knife works well) under hot water then wipe dry. Cut into 2-inch triangles, diamonds, or squares.

Cookies keep layered in wax paper in airtight containers for up to 1 week. They also freeze well for 2 - 3 weeks.

Cookie press rating: 5 cookies (out of 5)

December 23, 2010

Brownie Squares


Christmas is just two days away and I have to say that I'm very prepared this year. My shopping is done, cards mailed, and cookie assortment completed and shared. I have just one gift left to wrap and a dessert to make for Christmas Eve. I think that's pretty darn great for December 23rd. I could get used to not working. But I really shouldn't.

A few years ago Gourmet Magazine featured a basic butter cookie recipe and many cookies that you could make using the butter cookie dough as a base and adding a topping or flavoring to make a whole new cookie. I liked the idea of adding a brownie topping to the butter cookie base since I don't consider brownies to be very festive in and of themselves. By pressing the delicious butter cookie dough into a 9 x 13 inch pan, baking it, and then topping it with a chocolaty brownie and baking it again the normally dull brownie gets a starring role as a cookie. Omit the nuts if you want, but I think they give the cookie some needed crunch.

Basic Butter Cookies

2 cups all-purpose flour
1/2 teaspoon baking powder
1/2 teaspoon salt
1 1/2 sticks (3/4 cup) unsalted butter, softened
1 cup sugar
1 large egg
1/2 teaspoon vanilla

Whisk together flour, baking powder, and salt in a small bowl.

Beat together butter and sugar in a large bowl with an electric mixer at medium-high speed until pale and fluffy, about 3 - 4 minutes. Beat in egg and vanilla. Reduce speed to low, add flour mixture and mix until just combined.

Grease a 9 x 13 inch metal baking pan, then line with foil, leaving a 2-inch overhang on both ends. Then grease foil.

Press dough evenly into bottom of baking pan, using plastic wrap or wax paper on top to keep dough from sticking to your fingers. Chill until firm, about 20 minutes.

As crust chills, preheat oven to 375 degrees.

Bake crust until golden brown, about 20 - 25 minutes. Do not over bake. Remove from oven and cool on wire rack for 20 minutes. Leave oven on.

As crust cools, make the brownie topping.

Brownie Topping


1 1/2 sticks (3/4 cup) unsalted butter
10 1/2 ounce bittersweet chocolate, chopped (do not use unsweetened)
1 1/2 cups packed light brown sugar
3 large eggs, lightly beaten
1 1/4 teaspoons vanilla
3/4 cup all-purpose flour
1/4 cup plus 2 tablespoons Dutch-processed unsweetened cocoa powder
3/4 teaspoon salt
1 1/2 cups walnuts, coarsely chopped (toast walnuts by placing them on a baking sheet in a 350 degree oven for 5 - 6 minutes. Check often and shake pan during toasting.)

Melt butter and chocolate with brown sugar in a 3-quart heavy saucepan over moderate heat, stirring occasionally, until smooth. Remove from heat, then whisk in eggs and vanilla until combined well. Whisk in flour, cocoa, and salt, then stir in walnuts (if using).

Spread brownie batter over cooled crust and bake until set, about 20 minutes. Cool completely in pan on rack, about 1 1/2 hours. Lift from pan and using a heavy knife (Chef's knife), cut into 1-inch squares. Running knife under hot water and wiping dry will aid in making clean cuts.

Cookie press rating: 4 cookies (out of 5)

December 15, 2010

Double Chocolate-Peppermint Crunch Cookies


Every year I try a few new cookie recipes. Well, to be honest more than a few. Many are not worth writing about, but every now and then I come across a winner. Double Chocolate-Peppermint Crunch cookies definitely fall into the winner category.

I found the recipe in the December Bon Appetit magazine. I think what grabbed me was the enormous spread devoted to these festive gems. The larger than life cookies jumped off the page. The crushed peppermint candies and the melted chocolate decorating the tops make these the quintessential Christmas cookie. The cookie is soft, chocolaty, and is gently flavored with peppermint extract.

I baked these over the weekend and stored them in an airtight cookie tin overnight before I finished them off with the melted chocolate and candy. I popped them into the freezer and will share them with friends next week when the rest of my cookies are ready for distribution to friends and family.

May God bless those Bon Appetite editors. Seriously, I think I have a new favorite cookie.


Double Chocolate-Peppermint Crunch Cookies


2 1/2 cups bittersweet chocolate chips (not to exceed 61% cacao; 15 to 16 ounces)
1 1/2 cups all-purpose flour
1/4 cup natural unsweetened cocoa powder
1 teaspoon baking powder
1 teaspoon instant espresso powder
1/2 teaspoon salt
1/2 cup (1 stick) unsalted butter, softened
1 cup sugar
1 teaspoon vanilla extract
1 teaspoon peppermint extract
2 large eggs
4 candy canes or 16 hard peppermint candies, coarsely crushed

Preheat oven to 375 degrees. Line 2 rimmed baking sheets with parchment paper. Stir 2 cups chocolate chips in medium metal bowl set over saucepan of simmering water until melted and smooth (or use a double boiler). Measure 2/3 cup melted chocolate; transfer to a small bowl and reserve for drizzling.

Whisk flour, cocoa powder, baking powder, espresso powder, and salt in medium bowl. Using an electric mixer, beat butter in large bowl until creamy. Add sugar and extracts, beat until smooth. Add eggs, beat to blend. Beat in melted chocolate from medium bowl. Add dry ingredients, beat until just blended. Stir in remaining chocolate chips. Chill dough for 20 - 30 minutes if too warm to form into balls. Measure 1 level tablespoonful dough and roll between palms to form a ball. Place on prepared baking sheet. Repeat, spacing cookies 1 1/2 inches apart.

Bake until cookies are cracked on top, 8 to 9 minutes. Cookies should remain moist. Do not over bake. Cool cookies on baking sheet 5 minutes. Transfer cookies on parchment paper to racks to cool completely.

Finish cookies by rewarming reserved 2/3 cup chocolate in microwave or over saucepan of simmering water. Drizzle chocolate over cookies using a fork. Sprinkle crushed peppermints on each cookie. Chill until chocolate sets, about 20 minutes.

Can be made ahead of time and frozen in an airtight container for up to 3 weeks. Bring to room temperature before serving.

Cookie Press rating: 5 cookies! (out of 5)

December 10, 2010

Peanut Butter-Chocolate Kisses

This week has been hectic for sure. I had planned to post several of my favorite holiday cookie recipes, but the week just seemed to get away from me. So now that I have a few minutes, I'd like to share one of my tried and true cookie recipes. No cookie plate is complete without Peanut Butter-Chocolate Kisses. These are super easy to make, especially with kids. And best of all, you can eat any leftover chocolate kisses. And there are always some leftover!

Baker's tip: unwrap the Hershey kisses as cookies bake so that they're ready to go or better yet, have your helper do it.

The recipe says to immediately press the kiss into the top of each cookie as soon as they're out of the oven but I prefer to wait a minute or so. The cookie will still be soft, but will not be so hot as to start to melt the chocolate. Don't wait too long though, or the kiss will not stick to the cookie!

Peanut Butter-Chocolate Kisses

1/2 cup granulated sugar
1/2 cup lightly packed brown sugar
1/2 cup creamy peanut butter
1/4 cup butter, softened
1/4 cup shortening
1 egg
1 1/2 cups all-purpose flour
3/4 teaspoon baking soda
1/2 teaspoon baking powder
granulated sugar for rolling dough
36 Hershey's chocolate candy kisses

Heat oven to 375 degrees
Mix 1/2 cup granulated sugar, brown sugar, peanut butter, butter, shortening, and egg thoroughly. Stir in flour, baking soda, and baking powder. Mold dough into 1-inch balls then roll them in sugar. Place about 2 inches apart on an ungreased cookie sheet. Bake for 8 to 10 minutes. Remove sheet from oven, wait 1 minute and press candy kiss firmly in the middle of each cookie. Let cool completely.

December 3, 2010

Chocolate Gingersnaps


I normally follow recipes very closely to avoid any surprises at the end. This week for some reason my creativity blossomed and I decided to step out of my comfort zone a bit and try to improve a cookie that I already love. Gingersnaps are one of those classic cookies that just about everyone loves. Perfect for dunking into a cup of hot tea or a glass of milk, the spicy gingersnap belongs in the Cookie Hall of Fame.

At some point while I was measuring out the spices for the cookie I said to my self, "self, what if I add some dutch processed cocoa powder to the dough?" So I did. The result was a nice combination of subtle chocolate mixed with the spice of the ginger and cloves. I diced up some candied ginger and garnished the top of each cookie before popping them in the oven. When the cookies came out of the oven I added some white sanding sugar for a festive touch.

The cookies came out wonderfully, just as I had hoped. They are darker than traditional gingersnaps, but still pack that ginger punch. The candied ginger on top not only looks great, but adds some additional ginger flavor and sweetness to the cookie.

Try these and let me know what you think. Would you add more chocolate? More spices? I'd love for you to add comments below.

This Gingersnaps recipe is from Epicurious.com with my additions noted.

Chocolate Gingersnaps

2 1/4 cups all-purpose flour
1 teaspoon baking soda
1 1/2 teaspoons ground ginger
1 teaspoon ground cinnamon
1/2 teaspoon ground cloves
2 tablespoons dutch-processed cocoa powder
1 cup lightly packed brown sugar
1 1/2 sticks (3/4 cup) unsalted butter
1/4 cup unsulfured molasses
1 egg
1/4 cup granulated sugar
Candied ginger for garnish, chopped finely

In a large bowl sift together 1 cup plus 2 tablespoons of flour, baking soda, cocoa powder, and spices. Whisk in brown sugar.
In a small saucepan melt butter and whisk into flour mixture with molasses and egg until combined well. With a wooden spoon, stir in remaining 1 cup plus 2 tablespoons flour until combined well. Chill dough until firm, at least 1 hour or up to 2 days.

Preheat oven to 350 degrees and line baking sheets with parchment paper.

Roll level tablespoons of dough into balls and in a small bowl roll balls in granulated sugar to coat. Arrange balls about 2 inches apart on baking sheets and gently press each with the bottom of a glass to flatten slightly. Top each cookie with a few pieces of candied ginger pressing down slightly.

Bake 10 - 12 minutes until cookies have puffed slightly. When removed from the oven, cookies will collapse slightly and contain little cracks. While cookies are still hot, sprinkle lightly with white sanding sugar. Cool cookies on sheets for 2 - 3 minutes more and then transfer to cooling racks.

Cookies keep in an airtight container at room temperature for 5 days.

Cookie press rating: 4 cookies (out of 5)

Annual Cookie Bake


Every year my BFF Laura and I get together for our annual cookie bake. The three day extravaganza takes place in Upstate New York and includes shopping, Christmas music on the radio, wine drinking, chatting, eating, and of course cookie baking. Lots and lots of cookie baking.

Over the past nine years we've experienced blizzards, ice storms, rain, and even balmy weather. One thing we can always count on is a good time that starts with us scheduling the date months in advance.

Laura and I have our lineup of favorite cookies to bake and we do a pre-weekend review of the cookie list and nix cookies that we are tired of and discuss trying new recipes. If Laura had her way we would make Spritz cookies by the dozens and a batch or two of Chocolate Chip Oatmeal which she swears are Christmas cookies. I challenge her on this every year. Turns out Laura's mom, Donna, made them around Christmas when Laura was young so that's why she thinks they are Christmas cookies. I still argue that they are not but I think this year I'll relent and we'll make a batch or two.

We started the baking tradition in 2001 and one of my fondest memories is Laura standing at the counter measuring the flour for the very first batch of cookies we ever made. I didn't notice at first that she was enthusiastically shoveling the flour into the measuring cup, packing it down with the back of a spoon as she chatted away. I turned and she could tell by my audible gasp that something was wrong. I think I blacked out for a second or two and I may have actually put my hand out to stop the pack down from happening. We laugh about it to this day. Well, I laugh about it. Truth is, Laura has become an excellent baker and I wouldn't want to bake for the holidays without her at my side.

Here's our current cookie lineup which creates a nice presentation when displayed on a large cookie platter or tiered serving tray. I think it's important to present an array of cookies in a variety of shapes, textures, colors, and tastes. Half the fun of eating cookies is deciding which you want to sample from the plate.

Peanut Butter Kisses
Russian Teacakes (Snowballs)
Gingersnaps
Brownie Butter Cookies (butter cookie base topped with a brownie layer)
Caramel Pecan Cookies (butter cookie base topped with homemade caramel and pecans)
Toffee Bar Cookies
Spritz Cookies
Chocolate Chip Oatmeal

Over the course of the next few weeks I'll be adding these recipes to the blog as well as some new favorites so stay tuned as the cookie baking heats up for the holidays.

December 2, 2010

Everybody's a Cookie Monster at Heart

If the Cookie Monster would just log in to the Cookie Press he'd find everything he needs to make his own cookies. Why bother Santa when you can do it yourself?

If you're a blog visitor and haven't already done so, I encourage you to click the Facebook "like" button in the upper right hand corner. I'm trying to get 1,000 likes by the end of the month!

December 1, 2010

Stock Your Baking Pantry


In part two of Baking Basics let's go over some of the items you should have in your pantry in order to make cookies any time of the day or night. If your not a baker, you may not have many of these ingredients on hand so it's best to go out and buy them even if you're not planning to bake cookies today. I should also say that I'm not endorsing any particular brand of flour, sugar, etc. I usually buy what's on sale.

Flour
All-purpose flour is a must for any baker. Store in an air tight container at room temperature. Generally sold in 5 lb bags. Gently spoon flour into measuring cups and level off with back edge of a butter knife. Never pack flour!

Light Brown Sugar
Sold in 1 lb boxes or bags. Used with granulated sugar in any types of cookies. Gently pack brown sugar into measuring cups so that no air pockets remain. Tightly close bag when finished to avoid moisture escaping and the sugar hardening up.

Confectioners Sugar
Sold in 1 lb boxes or bags. Used in some cookie recipes as well as used to make glazes, icing, and dusting baked goods.

Sugar
You'll need a few kinds of sugar, but granulated sugar is most widely used. Occasionally a recipe will call for super-fine sugar. You can either buy this or make it yourself by pulsing granulated sugar in a bowl of a food processor fitted with a steel blade. Sold in 5 lb bags (and larger)

Salt
You probably already have salt in your cupboard. Don't use coarse salt for baking since recipes are written for table salt.

Baking Powder
Used as a leavener to increase volume and lighten the texture of cookies. It works by releasing carbon dioxide gas into the batter. Always level measuring spoon before adding to batter and replace after about a year since it loses oomph after that time. Test by placing a teaspoon into a dish of hot water. If it fizzes, it's still okay. If it doesn't, replace it. That's really all you need to know.

Baking Soda
Similar to baking powder, baking soda assists in creating light cookies that puff instead of spread on the pan. After opening, store in an airtight container or in a sealed plastic bag. Measure as you would baking powder, leveling the measuring spoon before adding to the dough or flour mixture.

Butter
Always buy and use unsalted butter for baking. In salted butter, the amount of salt varies widely among brands. All recipes are written using unsalted butter. Many recipes require butter at room temperature. Speed the softening process by microwaving for about 10 seconds. Don't melt it, just soften it.

Eggs
Generally large eggs work fine in recipes. You don't need to buy jumbo eggs or organic, free-range eggs. Eggs should generally be at room temperature before you use them. Let warm to room temperature on the counter or run under warm water to take the chill off.

Extracts
Vanilla extract is most commonly used in baking, but there are many kinds of extracts which add flavor to doughs. Some are peppermint, orange, lemon or lime. Buy pure vanilla extract. A small bottle will last a long time for the occasional baker.

Coco Powder
Most people have either Hershey's or Nestle on hand. These will work fine but if you're adventurous try dutch-processed coco powder to add intense chocolate flavor to cookies. A box runs about $8.00 - $10.00 but will last a long time. It's well worth the investment.

Chocolate
For basic chocolate chip cookies, use semi-sweet chocolate chips or chunks which are sold in bags. Nestle dominates the market, but most stores now carry upscale brands such as Ghirardelli or Scharffen Berger.

Other Ingredients
You should have a variety of nuts (peanuts, pecans, walnuts) stocked in your pantry as well as shredded coconut, dried fruits such as raisins or cranberries.

So that's it. Everything you need in your pantry to bake cookies. So what are you waiting for? Start baking!