March 2, 2011

Crispy Cocoa-Walnut Ice Cream Sandwich Cookies


Many of you may be wondering where I've been for the last month or so since my last post back in late January. My life has been consumed by the stressful process of moving. Well, not just moving, but the whole real estate buying process in general. Moving in and of itself is stressful. Add that to a city co-op real estate transaction and it's enough to make anyone start taking Xanax. But all that's behind me and all that's left is unpacking a few boxes and deciding where to hang pictures. The fun stuff.

Needless to say, I haven't had much time to bake and I am going through withdrawals. Kind of like Charlie Sheen these days. Frankly, I'm a little scared to bake in my new oven. It's fairly old and so far the temperature dial is only a mere suggestion of what the inside heat might be. I stress the word MIGHT. Last night I made a meatloaf and set the oven for 350 degrees. About 30 minutes in I checked and the oven thermometer inside was 400! Luckily, I have a window next to the oven so when I do burn something I just open the window and wave the smoke out.

A few weeks before the move I made a special treat for Valentine's Day. Crispy Cocoa-Walnut Cookies admirably served as the outer shell enveloping creamy vanilla ice cream. Topped with chocolate sauce, this dessert was a magnificent ending to a merely average dinner.

Feel free to make these any time of the year. Summer would be an ideal time. Or now. How about right now? Who can resist an ice cream cookie sandwich? No one that I know.

The cookie recipe is courtesy of bon appétit's February issue. The ice cream part was my idea. I substituted walnuts for pecans but you can use any nuts. I think hazelnuts would be an excellent choice.


Crispy Cocoa-Pecan (Walnut) Cookies


1 1/2 cups all-purpose flour
3 tablespoons natural unsweetened cocoa powder (scooped, then leveled)
1/2 teaspoon baking soda
10 tablespoons (1 1/4 sticks) unsalted butter, melted and cooled
1/3 cup (lightly packed) brown sugar
1/3 cup sugar
2 tablespoons plus 2 teaspoons light corn syrup
2 tablespoons whole milk
1 teaspoon vanilla extract
1 cup chopped nuts (pecans or walnuts)
1/2 cup bittersweet chocolate chips

Whisk flour, cocoa, baking soda, and 1/2 teaspoon salt in a medium bowl. Stir butter, brown sugar, sugar, corn syrup, milk, and vanilla in another medium bowl until smooth. Stir in the flour mixture, then nuts. Cover and chill until firm, about 4 hours or overnight.

Position 1 rack in the top third and 1 rack in the bottom third of the oven and preheat to 325 degrees.

Line 3 large baking sheets with parchment. Measure 2 level tablespoons dough and roll between palms into a ball. Place on prepared baking sheet. Using the palm of your hand, gently press the dough onto the cookie sheet to form a 3-inch diameter disk. Repeat with remaining dough, spacing 5 inches apart.

Bake cookies 8 minutes, reverse sheets. Continue baking until cookies are flat and beginning to darken around the edges, about 10 more minutes. Transfer cookies on parchment paper to rack. Cookies will crisp while they cool.

Store cookies in an airtight container at room temperature.

Form Ice Cream Sandwiches

Let ice cream soften for 5 minutes or so. Scoop one generous portion of vanilla ice cream onto the bottom of one cookie and then place another cookie on top, pressing gently. Remove any excess ice cream by gently scraping the sides of the cookie with a spatula. Top with melted bittersweet chocolate and serve immediately. Or place on cookie sheet and return sandwiches to the freezer until ice cream has hardened and chocolate has set. Wrap tightly in plastic wrap. Best eaten within 5 days.

Cookie Press Rating: 4 cookies (out of 5)

January 29, 2011

Happy Anniversary Cookie Press!


Did you ever miss your anniversary? Be honest. I'm sure there was one year when you woke up in the morning and completely forgot about it. Perhaps something during the day reminded you of the special day. Perhaps your spouse gently hinted until you got the message. Or perhaps you didn't remember at all until you were unceremoniously reminded by the one you love. Well, which is it?

A few weeks ago I let a very special day go by unnoticed. The Cookie Press celebrated its one year anniversary on January 20. And I missed it. Perhaps it was a snowy day and my brain froze. Or perhaps I was just busy with other things. C'est la vie.

The blog has been a wonderful way to express my creativity in the kitchen and online as well. I've loved sharing my successes like Penguin Cutouts and even my disappointments like Lemon-Zucchini Cornmeal Cookies (bleck!). Above all, I've loved receiving comments from relatives, friends, and friends of friends. It's gratifying to know people are out there reading even if they aren't trying every single recipe I post.

If you're a Twitter user and aren't following the Cookie Press, shame on you. Start following @CookiePress right now. We also have a FaceBook Fan Page. I know they're called business pages now, but I prefer to use the former term. Search for "Cookie Press" on FaceBook and then click "like" to start following. I encourage everyone to upload pictures, post recipes, and join the cookie conversation.

You may have noticed that the number of postings has diminished over the last few weeks and there's a reason for it. My partner and I will be moving soon and I've been consumed with the mountains of paperwork needed these days to get financing and Co-op board approval. Thankfully both approvals are behind us and all that's left is signing about a thousand documents and packing and unpacking boxes. We're looking forward to the new adventures we'll find in Riverdale, just north of Manhattan.

I'm looking forward also to another delicious year of making and nibbling on cookies! That's all for now. I've got a batch in the oven right now and I think they're burning!

January 21, 2011

Hazelnut Crinkle Cookies


Hazelnuts are high in protein and relatively low in fat as compared to other nuts. Also known as Filberts, these babies have tons of fiber, iron, phosphorus, vitamins B1, B2, C, and E, folate, and other essential nutrients. They are the champion of nut family, contributing to lower cholesterol levels. Just think of what a daily dose of hazelnuts combined with a statin like Lipitor would do to lower your cholesterol.

Plus, did I mention they taste delicious to boot? That is, if you're not allergic.

As in life, with the good comes the bad. Hazelnuts have a skin which can be difficult (and messy) to remove. Perhaps that's why they're not as popular as walnuts or pecans (just a theory).

I'll be honest. These cookies took time to make. Most of it was spent removing the skins after a boiling, washing, and drying process which I'll describe later. That said, if you can find blanched hazelnuts, buy them. My local Wholefoods did not have them, so I was stuck spending nearly an hour trying to get the tough skins removed.

I tried a new method of removing skins and it worked well. The traditional way involves roasting the nuts in a 350 degree oven for about 10 minutes and then placing the nuts in a dish towel and rubbing the heck out of them until the skins come off. The new way is easier. Bring a quart of water to a boil in a saucepan and add 4 tablespoons of baking soda. Turn down the head to avoid a messy boil over and continue boiling for 3 - 4 minutes. Drain nuts in a colander and then rinse under cold water. Rub between your palms under the water and skins will come off easily. Dry on paper towels and roast in the oven as described above. Nuts may take longer to toast depending on how much water they absorbed.

Chop nuts by hand with a chef's knife or place in a food processor being careful not to chop nuts into a fine powder. You want to retain the texture.

Skinned and Toasted Hazelnuts Ready for Chopping


Hazelnut Crinkle Cookies
(adapted from Better Homes & Gardens, November 1995 issue)

3 cups all-purpose flour
2 teaspoons baking powder
1/2 teaspoon salt
1 11 ounce jar of chocolate hazelnut spread (Nutella or similar)
1/4 cup shortening
1 1/3 cups sugar
1 teaspoon vanilla
2 eggs
1/3 cup whole milk
1/2 cup chopped, toasted hazelnuts (see above for toasting instructions)
Additional finely chopped hazelnuts (about 1 1/2 cups)
Confectioners sugar for rolling and dusting

In a medium mixing bowl combine flour, baking powder, and salt. Set aside.

In a large mixing bowl combine chocolate-hazelnut spread and shortening. Beat with an electric mixer on medium speed until combined. Add sugar and beat until fluffy. Add vanilla and egg. Beat until combined.

Alternately add flour mixture and milk to creamed mixture, beating on medium speed until just combined. Stir in 1/2 cup chopped hazelnuts. Cover and chill for about 2 hours until firm.

Preheat oven to 375 degrees.

Shape dough into 1 or 1 1/2 balls. Roll in finely chopped hazelnuts and then in confectioners sugar. Place balls 2 inches apart on a lightly greased cookie sheet or on parchment paper.

Bake at 375 degrees for 8 to 10 minutes until surface is cracked and cookies are set. Cool on wire rack. When cool dust in confectioners sugar again and store in an airtight container at room temperature. Makes approximately 6 dozen cookies.

Cookie Press Review:
These cookies are bursting with hazelnut flavor and are a nice change from other chocolate and nutty cookies. The texture is light, with a soft and chewy center. Perfect with tea or a glass of milk, these cookies get my seal of approval. They would be great to include in a holiday cookie assortment or to be devoured at any time during the year.

Cookie Press rating: 4 cookies (out of 5)

January 11, 2011

Let it Snow!


Another winter storm is headed toward New York. Our third big winter blast of the year. Enough already I tell you! Instead of moping around the apartment and cursing the weather I've decided to embrace it. And what better way to do it than with Snowflake Cookies. I made these a few weeks ago as part of my holiday baking extravaganza and remembered to take a few photos so that I could share later.

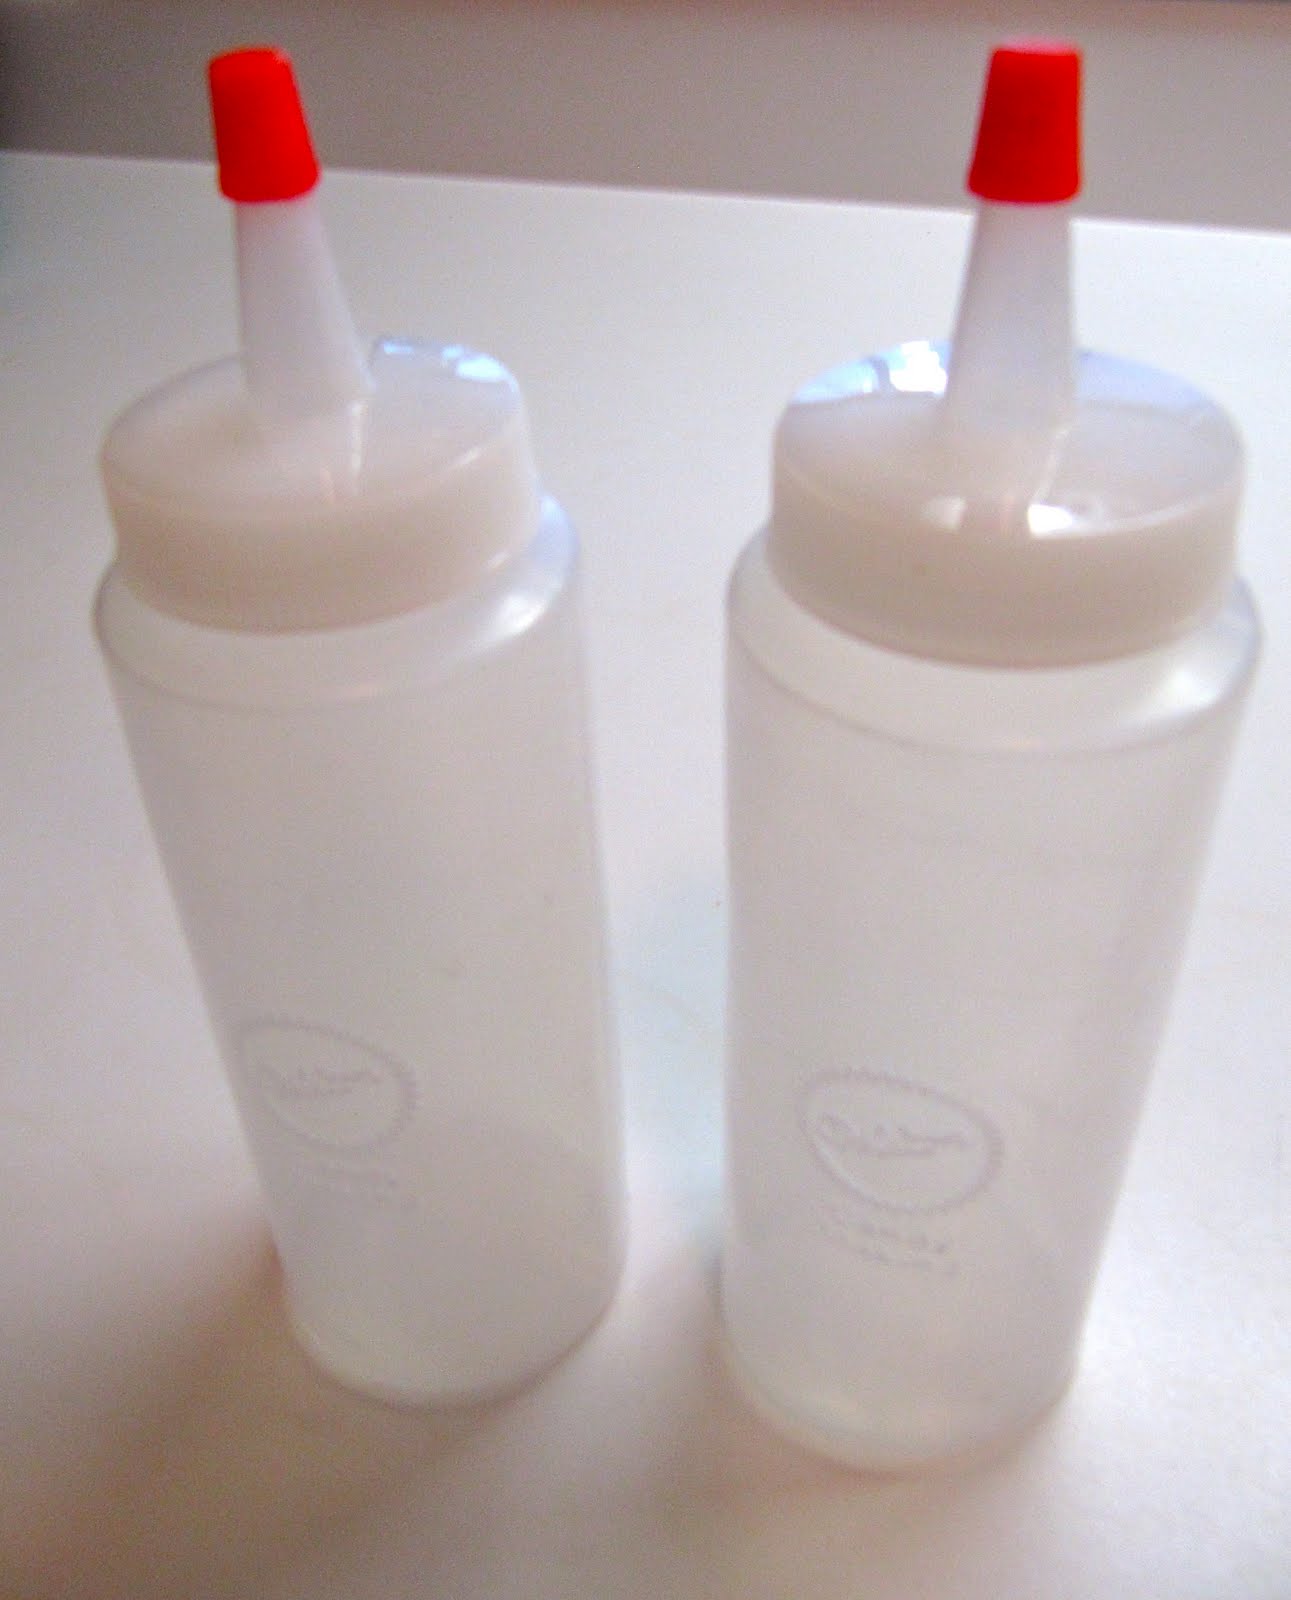
The cookie itself is my mom's famous sugar cookie cutout recipe. It yields a flavorful, sturdy cookie with a tender crumb. I decorated the cookies with royal icing applied to the cookie using a simple plastic squeeze bottle which are available in craft stores. I found mine at Bed, Bath & Beyond.

To decorate, hold the cookie in one hand and swirl the icing onto the cookie with the squeeze bottle, making sure to touch the cookie with the tip of the bottle. Have fun with it. I decorated the cookies with white sanding sugar to give them a glisten. I also made stars at the same time. For the stars, I iced the whole cookie and finished it with sanding sugar.

Christmas Cookie Cut Outs

2 cups flour
2 teaspoons baking powder
3/4 teaspoon salt
1 cup white sugar
1 egg
1/2 cup butter (1 stick)
1 teaspoon vanilla

Sift the flour, baking powder and salt together and set aside.
Cream butter and sugar together in a mixer until light and fluffy.
Add the egg and vanilla, mix well.
Add dry ingredients and mix until ingredients come together. Do not over mix.

Roll out dough until 1/8 inch thick, cut into shapes and transfer to parchment-lined cookie sheets. Bake at 375 degrees for 8 to 10 minutes until lightly browned around the edges. Let cookies cool on try for about a minute and remove to wire racks to finish cooling.

Decorate with royal icing.

Royal Icing
2 large egg whites
1 pound confectioners' sugar
food coloring and/or sanding sugar

Beat egg whites, sugar, and 2 t water on low speed for 10 minutes. For thicker icing continue to beat 2 or 3 minutes more. Transfer to smaller bowls and add food coloring as desired. If icing is too thick, add a drop or two of water to thin. Keep icing covered with plastic wrap when not using to avoid hardening.

Stars and Snowflake


Squeeze Bottles

December 30, 2010

Happy New Year!


I can't believe that we have just one day left in 2010! Seems like just yesterday we were ushering in a new decade and now we're on to 2011. And next year I'll be saying the same thing. Where does the time go?

This year for Christmas Eve dinner at my Aunt's home I wanted to bring a special dessert. I came across a page I had clipped from Martha Stewart Living magazine last year. She featured her take on a traditional French dessert, the croquembouche. It's not a gut-busting dessert (unless you decide to eat the whole thing!) but luckily, I wasn't the only one bringing dessert for the eight of us. I especially liked Martha's version because it is decorated with star cut-out cookies!

The words croque en bouche translate to mean "crunch in the mouth." It is made of about 50 puffs filled with a caramel cream and dipped in a thin caramel sugar that hardens when cooled. The result is crunchy, sweet, and soft all in a single bite. The puffs are assembled into a cone-shaped form and then decorated with the cookie stars or more traditionally, spun sugar.

I made the croquembouche over three days starting first with the sugar cookies. I used a basic sugar cookie recipe and cut out various stars in several sizes. I happened to have a tiny star cutter that came as part of a set used to make Linzer Torte cookies. It was perfect to create the tiny stars. I decorated the cookies with white royal icing and dusted them with white sanding sugar for some sparkle.

I've made cream puffs before so making the puffs wasn't too much of a hassle. I dusted off my pastry bag with a 1/4 inch tip and whipped out about 75 puffs fairly quickly. Then I made the caramel by melting sugar in a saucepan, adding 1 cup of heavy cream, and returning the mixture to a boil. Finally, I added creme fraiche, vanilla, and salt and let it cool overnight in the refrigerator.

The final steps involved making a light caramel sauce and carefully dipping the filled puffs into the scalding sauce without burning my fingers. After the tops are dipped and have cooled, I repeated the process this time dipping the bottoms and assembling the final cone-shaped masterpiece. In the final step, I added the decorated stars by affixing them with a dab of royal icing. Don't worry, it's not as difficult as it sounds!

For me, the best part of the whole process came when I was transporting the croquembouche down to the car. The elevator door opened on my floor and I strolled in holding the festive dessert in the palm of my hand. The couple on the elevator immediately stopped their conversation to marvel at the croquembouche and asked me if I had made it. When I answered that I had, the gentlemen replied with an accent, "the whole thing?"

"All of it," I said.

It took me a moment to realize that the couple on the elevator were French!
I didn't need to tell them what it was since they obviously knew. We chatted the rest of the way down and though the lobby. I think I may have possibly just made their entire day. I know they made mine.

Instead of typing the entire recipe out, I've included a link to Martha's website where you can print out the recipe. I also found a video online of Martha making a croquembouche with special show guest, Rachel Maddow. It was a bit strange to hear Martha and Rachel talk politics while dipping puffs into caramel!


Happy New Year! I look forward to bringing you more fabulous cookie recipes in 2011 as the blog turns one year old!

December 28, 2010

Caramel Pecan Cookies


Last week's entry for Brownie Squares yielded some interesting comments from readers. My friend Lisa said, "This looks so good I may get the apron out tonight." And my friend Myra said, "OMG! These look incredible!! :-)." I love that Myra included a smiley face with her comment.

Today I think I'll share another recipe using the same butter cookie base but adding caramel and pecans on the top. If you like sweet and gooey caramel, these cookies are TDF (to die for). I've made them every year for the past five years. I shared the recipe with my mom and she has been known to make them throughout the year.

If you have never made caramel before it's not too difficult but you do need to pay attention to what you're doing so that you don't burn yourself or your house down. Caramel is made by melting sugar, adding heavy cream, cooking until the caramel is smooth, and finally adding butter, vanilla, and salt. Be careful when adding the cream, as the melted sugar will bubble and steam vigorously. Make sure to use a 3 quart saucepan to avoid a catastrophic boil over.

Basic Butter Cookies

2 cups all-purpose flour
1/2 teaspoon baking powder
1/2 teaspoon salt
1 1/2 sticks (3/4 cup) unsalted butter, softened
1 cup sugar
1 large egg
1/2 teaspoon vanilla

Whisk together flour, baking powder, and salt in a small bowl.

Beat together butter and sugar in a large bowl with an electric mixer at medium-high speed until pale and fluffy, about 3 - 4 minutes. Beat in egg and vanilla. Reduce speed to low, add flour mixture and mix until just combined.

Grease a 9 x 13 inch metal baking pan, then line with foil, leaving a 2-inch overhang on both ends. Then grease foil.

Press dough evenly into bottom of baking pan, using plastic wrap or wax paper on top to keep dough from sticking to your fingers. Chill until firm, about 20 minutes.

As crust chills, preheat oven to 375 degrees.

Bake crust until golden brown, about 20 - 25 minutes. Do not over bake. Remove from oven and cool on wire rack for 20 minutes. Leave oven on.

While crust cools, make the caramel topping.


Caramel Pecan Topping


1 1/2 cups sugar
1 cup heavy cream
3/4 stick (6 tablespoons) unsalted butter cut into bits
1 teaspoon vanilla
1/2 teaspoon salt
2 cups pecans, toasted, cooled, and coarsely chopped

Make topping while crust cools:
Cook sugar in a 3 quart heavy saucepan over moderate heat, undisturbed, until it begins to melt. Continue to cook, stirring occasionally with a fork, until sugar is melted to a deep golden caramel. Be careful not to burn. Tilt pan and carefully pour in cream. Sugar will harden and steam vigorously so be careful. Place back on burner and continue cooking over moderately low heat, stirring, until caramel is smooth. Increase heat as needed if caramel is not yet smooth after 2 - 3 minutes. Remove from heat and stir in butter, vanilla, salt, and pecans.

Immediately spread topping over cooled crust and bake until bubbling, about 20 minutes. Remove from oven and cool on a wire rack for about 2 hours.

Lift cookies out of pan by gently loosening and lifting the foil. Place on large cutting board and remove foil. Run a knife (chef's knife works well) under hot water then wipe dry. Cut into 2-inch triangles, diamonds, or squares.

Cookies keep layered in wax paper in airtight containers for up to 1 week. They also freeze well for 2 - 3 weeks.

Cookie press rating: 5 cookies (out of 5)

December 23, 2010

Brownie Squares


Christmas is just two days away and I have to say that I'm very prepared this year. My shopping is done, cards mailed, and cookie assortment completed and shared. I have just one gift left to wrap and a dessert to make for Christmas Eve. I think that's pretty darn great for December 23rd. I could get used to not working. But I really shouldn't.

A few years ago Gourmet Magazine featured a basic butter cookie recipe and many cookies that you could make using the butter cookie dough as a base and adding a topping or flavoring to make a whole new cookie. I liked the idea of adding a brownie topping to the butter cookie base since I don't consider brownies to be very festive in and of themselves. By pressing the delicious butter cookie dough into a 9 x 13 inch pan, baking it, and then topping it with a chocolaty brownie and baking it again the normally dull brownie gets a starring role as a cookie. Omit the nuts if you want, but I think they give the cookie some needed crunch.

Basic Butter Cookies

2 cups all-purpose flour
1/2 teaspoon baking powder
1/2 teaspoon salt
1 1/2 sticks (3/4 cup) unsalted butter, softened
1 cup sugar
1 large egg
1/2 teaspoon vanilla

Whisk together flour, baking powder, and salt in a small bowl.

Beat together butter and sugar in a large bowl with an electric mixer at medium-high speed until pale and fluffy, about 3 - 4 minutes. Beat in egg and vanilla. Reduce speed to low, add flour mixture and mix until just combined.

Grease a 9 x 13 inch metal baking pan, then line with foil, leaving a 2-inch overhang on both ends. Then grease foil.

Press dough evenly into bottom of baking pan, using plastic wrap or wax paper on top to keep dough from sticking to your fingers. Chill until firm, about 20 minutes.

As crust chills, preheat oven to 375 degrees.

Bake crust until golden brown, about 20 - 25 minutes. Do not over bake. Remove from oven and cool on wire rack for 20 minutes. Leave oven on.

As crust cools, make the brownie topping.

Brownie Topping


1 1/2 sticks (3/4 cup) unsalted butter
10 1/2 ounce bittersweet chocolate, chopped (do not use unsweetened)
1 1/2 cups packed light brown sugar
3 large eggs, lightly beaten
1 1/4 teaspoons vanilla
3/4 cup all-purpose flour
1/4 cup plus 2 tablespoons Dutch-processed unsweetened cocoa powder
3/4 teaspoon salt
1 1/2 cups walnuts, coarsely chopped (toast walnuts by placing them on a baking sheet in a 350 degree oven for 5 - 6 minutes. Check often and shake pan during toasting.)

Melt butter and chocolate with brown sugar in a 3-quart heavy saucepan over moderate heat, stirring occasionally, until smooth. Remove from heat, then whisk in eggs and vanilla until combined well. Whisk in flour, cocoa, and salt, then stir in walnuts (if using).

Spread brownie batter over cooled crust and bake until set, about 20 minutes. Cool completely in pan on rack, about 1 1/2 hours. Lift from pan and using a heavy knife (Chef's knife), cut into 1-inch squares. Running knife under hot water and wiping dry will aid in making clean cuts.

Cookie press rating: 4 cookies (out of 5)