Showing posts with label cutouts. Show all posts

January 11, 2011

Let it Snow!


Another winter storm is headed toward New York. Our third big winter blast of the year. Enough already I tell you! Instead of moping around the apartment and cursing the weather I've decided to embrace it. And what better way to do it than with Snowflake Cookies. I made these a few weeks ago as part of my holiday baking extravaganza and remembered to take a few photos so that I could share later.

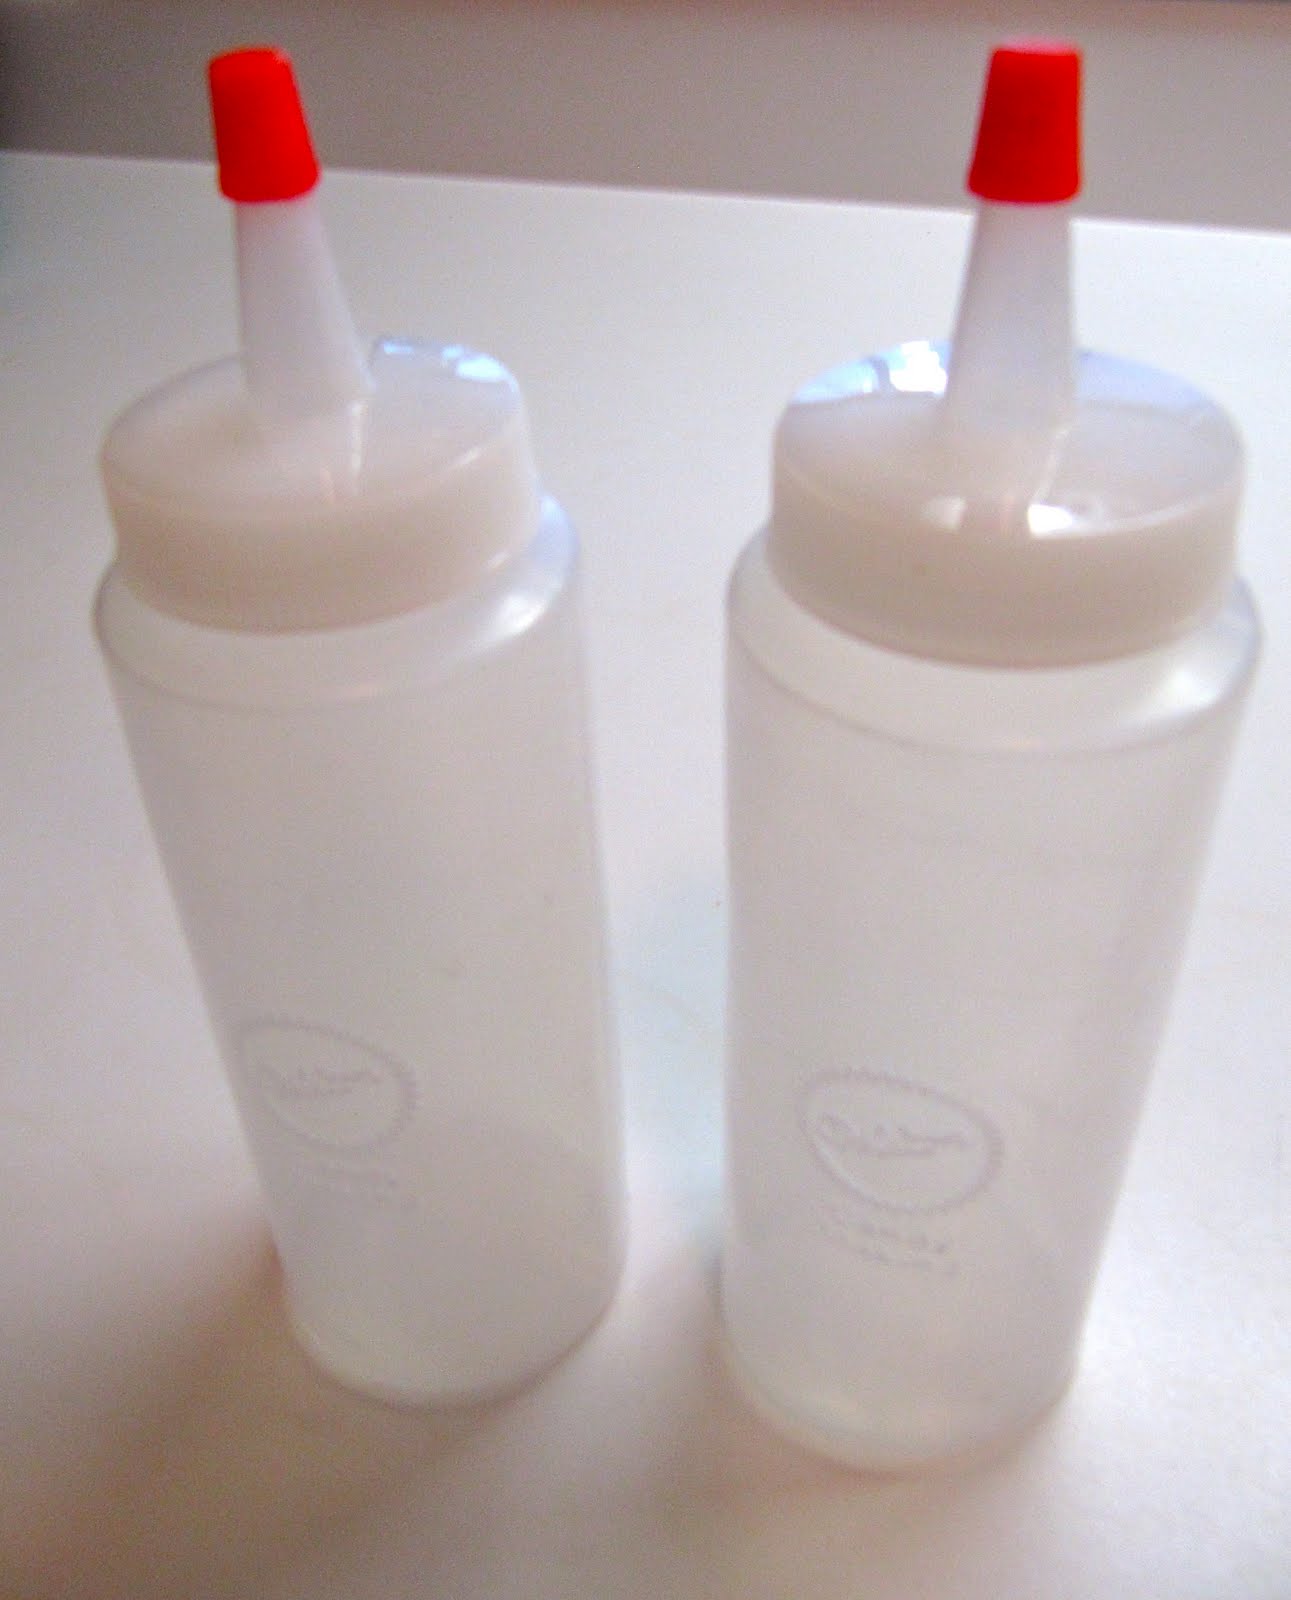
The cookie itself is my mom's famous sugar cookie cutout recipe. It yields a flavorful, sturdy cookie with a tender crumb. I decorated the cookies with royal icing applied to the cookie using a simple plastic squeeze bottle which are available in craft stores. I found mine at Bed, Bath & Beyond.

To decorate, hold the cookie in one hand and swirl the icing onto the cookie with the squeeze bottle, making sure to touch the cookie with the tip of the bottle. Have fun with it. I decorated the cookies with white sanding sugar to give them a glisten. I also made stars at the same time. For the stars, I iced the whole cookie and finished it with sanding sugar.

Christmas Cookie Cut Outs

2 cups flour
2 teaspoons baking powder
3/4 teaspoon salt
1 cup white sugar
1 egg
1/2 cup butter (1 stick)
1 teaspoon vanilla

Sift the flour, baking powder and salt together and set aside.
Cream butter and sugar together in a mixer until light and fluffy.
Add the egg and vanilla, mix well.
Add dry ingredients and mix until ingredients come together. Do not over mix.

Roll out dough until 1/8 inch thick, cut into shapes and transfer to parchment-lined cookie sheets. Bake at 375 degrees for 8 to 10 minutes until lightly browned around the edges. Let cookies cool on try for about a minute and remove to wire racks to finish cooling.

Decorate with royal icing.

Royal Icing
2 large egg whites
1 pound confectioners' sugar
food coloring and/or sanding sugar

Beat egg whites, sugar, and 2 t water on low speed for 10 minutes. For thicker icing continue to beat 2 or 3 minutes more. Transfer to smaller bowls and add food coloring as desired. If icing is too thick, add a drop or two of water to thin. Keep icing covered with plastic wrap when not using to avoid hardening.

Stars and Snowflake


Squeeze Bottles

December 30, 2010

Happy New Year!


I can't believe that we have just one day left in 2010! Seems like just yesterday we were ushering in a new decade and now we're on to 2011. And next year I'll be saying the same thing. Where does the time go?

This year for Christmas Eve dinner at my Aunt's home I wanted to bring a special dessert. I came across a page I had clipped from Martha Stewart Living magazine last year. She featured her take on a traditional French dessert, the croquembouche. It's not a gut-busting dessert (unless you decide to eat the whole thing!) but luckily, I wasn't the only one bringing dessert for the eight of us. I especially liked Martha's version because it is decorated with star cut-out cookies!

The words croque en bouche translate to mean "crunch in the mouth." It is made of about 50 puffs filled with a caramel cream and dipped in a thin caramel sugar that hardens when cooled. The result is crunchy, sweet, and soft all in a single bite. The puffs are assembled into a cone-shaped form and then decorated with the cookie stars or more traditionally, spun sugar.

I made the croquembouche over three days starting first with the sugar cookies. I used a basic sugar cookie recipe and cut out various stars in several sizes. I happened to have a tiny star cutter that came as part of a set used to make Linzer Torte cookies. It was perfect to create the tiny stars. I decorated the cookies with white royal icing and dusted them with white sanding sugar for some sparkle.

I've made cream puffs before so making the puffs wasn't too much of a hassle. I dusted off my pastry bag with a 1/4 inch tip and whipped out about 75 puffs fairly quickly. Then I made the caramel by melting sugar in a saucepan, adding 1 cup of heavy cream, and returning the mixture to a boil. Finally, I added creme fraiche, vanilla, and salt and let it cool overnight in the refrigerator.

The final steps involved making a light caramel sauce and carefully dipping the filled puffs into the scalding sauce without burning my fingers. After the tops are dipped and have cooled, I repeated the process this time dipping the bottoms and assembling the final cone-shaped masterpiece. In the final step, I added the decorated stars by affixing them with a dab of royal icing. Don't worry, it's not as difficult as it sounds!

For me, the best part of the whole process came when I was transporting the croquembouche down to the car. The elevator door opened on my floor and I strolled in holding the festive dessert in the palm of my hand. The couple on the elevator immediately stopped their conversation to marvel at the croquembouche and asked me if I had made it. When I answered that I had, the gentlemen replied with an accent, "the whole thing?"

"All of it," I said.

It took me a moment to realize that the couple on the elevator were French!
I didn't need to tell them what it was since they obviously knew. We chatted the rest of the way down and though the lobby. I think I may have possibly just made their entire day. I know they made mine.

Instead of typing the entire recipe out, I've included a link to Martha's website where you can print out the recipe. I also found a video online of Martha making a croquembouche with special show guest, Rachel Maddow. It was a bit strange to hear Martha and Rachel talk politics while dipping puffs into caramel!


Happy New Year! I look forward to bringing you more fabulous cookie recipes in 2011 as the blog turns one year old!

August 27, 2010

Cookie Commerce


Ever since I started blogging about cookies my friends and family have been telling me to start a cookie business. Sure it sounds good, but I'm not sure it's something I want to do on a full-time basis. Sometimes hobbies are just hobbies. I'm afraid that if I'm forced to bake cookies it won't be fun any longer and I'm not sure I want to risk it. But on the other hand, I enjoy baking and that should count for something, right?

When my friend Ali asked me to make angel cut out cookies for her son's baptism this weekend I thought it might be a good time to test my theory. Can I bake cookies, deliver on time, make some money, and still have fun doing it? The answer to these questions are yes, yes, yes, and maybe. Let me explain.

After Ali and I decided on angel cookies I asked, "how many do you need?" After a slight hesitation she said, "Um, how about fifty?" Her voice raised a few octaves when she said fifty. I said "sure," no problem. The voice inside my head screamed "PROBLEM!" I had never made fifty, hand-cut, hand-iced cookies before. Ever. I had no idea how long it would take or how much ingredients I would need. But I had a few weeks to figure the details out and I was up for the challenge. I made a test batch using a new sugar cookie recipe but didn't like how the cookies puffed up, essentially taking most of the detail out of the design. My sister-in-law Tammy suggested using her no-fail Martha recipe which I tried and was pleased with the results. I calculated that I would need to make three batches of dough.

Over the course of two days I rolled dough and cut the cookies individually around a cardboard angel template which my mom drew many years ago. I carefully placed each angel on the cookie sheet and made last minute adjustments to the head or wing as needed. I was obsessing about each cookie. After all, this was my first foray into cookie making for profit.

Next I iced a few just to test my skills. For the wings, I decided on white icing sprinkled with white sanding sugar. For the body, a baby blue. For the hair, a light brown. I tried peach colored icing for the face, but decided it looked like the angel had a bad spray tan. It was best to not ice the face at all. I dabbed a spot of blue icing for the eye and tried bit of brown icing for the lips which ended up looking like a mustache. In the end I went with a pink icing for the lips, keeping the face details to a minimum.

Tammy also recommended that I use plastic squeeze bottles to apply the royal icing which I did and which worked beautifully. Once I got going, the process moved along and I enjoyed being a human assembly line. My angels began to multiply like rabbits in springtime and soon my counters and table were brimming with angel cookies.

Finished Cookies


Mother nature threw in a challenge of her own by turning up the humidity which caused the cookies to absorb the moisture in the air. The result was very soft cookies which were good for eating, but not good for icing and transporting. I cranked up the A/C and hoped for the best. Unfortunately, a few of the angels succumbed to the humidity and lost their heads as I picked them up to put the finishing touches on them. But fortunately, I had made extras and had just enough.

Headless Angels


The last challenge was getting the delicate cookies packed and delivered to Ali's apartment on the east side of Manhattan. I packed the cookies in various department store boxes since they were sturdy enough to carry the weight of the cookies. With the cookies carefully packed and layered with wax paper, I set off to Ali's apartment on East 45th Street. I was carrying two canvas bags, one needed to be kept flat and which I set on my lap during the subway ride. The other was held by my free hand. Just as the train pulled into Times Square it jerked unexpectedly and the man standing near me fell onto the man sitting two people away from me. The fall wasn't just a slip or a bump. It was a full-fledged, flat on your face, head first, ass over teakettle (to quote my mom) kind of fall. The six foot tall man landed squarely and firmly onto the guy near me with enough force to knock off his glasses. Had I been sitting there, just three feet to my left, the cookies would have been destroyed. Whew. That was close. I transferred to the shuttle over to Grand Central and then hauled the cookies through the masses of commuters. I was bobbing and weaving like a prizefighter. I reached my destination with the cookies intact.

Ali was delighted with the cookies as was her son, Vincenzo.

And so ends the story of my first professional cookie baking project. Stressful? Somewhat. Rewarding? Certainly. Would I do it again? You bet.

Here are the recipes I used for the sugar cookies and icing as well as a few tips when working with royal icing.

Sugar Cookies


4 cups all-purpose flour, sifted
1/2 teaspoon salt
1 teaspoon baking powder
1 cup (2 sticks) butter, unsalted
2 cups sugar
2 eggs
2 teaspoons vanilla extract

Sift flour, salt, and baking powder into a bowl. Set aside.
Cream butter and sugar in the bowl of an electric mixer fitted with a paddle attachment until light and fluffy, about 3 minutes. Beat in eggs and vanilla.

Add flour mixture, mixing on low until thoroughly combined. Wrap dough in plastic wrap, separating into two equal sized pieces. Chill for 30 minutes or overnight.

Heat oven to 325 degrees. Roll dough on lightly floured surface to a thickness of 1/8 inch. Cut into desired shapes and transfer to ungreased baking sheets. Refrigerate until firm, about 15 minutes. Bake 8 to 10 minutes until edges brown slightly. Cool on wire racks.

Royal Icing

3 tablespoons meringue powder (available at baking supply stores or at Michael's Crafts)
1 lb sifted confectioners' sugar (it's important to sift the sugar!)
5 - 6 tablespoons warm water
1 teaspoon flavoring such as vanilla, lemon, orange, or almond extract (optional)

Combine all ingredients and mix with an electric mixer 5 to 6 minutes on low speed. Scrape sides of bowl as necessary. Divide icing into smaller bowls an add food coloring one drop at a time until desired color is reached.

Keep icing covered with a piece of plastic wrap directly on top of the icing so it doesn't dry out.

The goal is to make the consistency thin for making outlines but not too thin so it runs (like a glaze). It should be firm enough to hold its shape. Add water or additional confectioners' sugar to thin or thicken. Fill plastic squeeze bottle or pastry bag fitted with #2 tip and outline the cookie.

To fill inside the outline, add water to existing icing or make a new batch, adding water as needed to create a glaze-like icing (it should be a little on the thick side). Again, fill pastry bag or squeeze bottle with icing and fill in the outlines. Add sanding sugar or decorations as desired. Icing will spread and fill in any empty holes.

Tips for Success:

1. Use a toothpick to scrap any extra icing off of the cookie. This works well to smooth out the area where your outline begins and ends. You can also wet your finger and gently press to close the seam.

2. Use a toothpick to apply small icing details.

3. Always keep icing covered when not using. Any dried pieces will clog the pastry bag tip.

4. When creating the outline, hold the tip slightly above the cookie and let it fall gently.

5. The squeeze bottles are easier to use than the pastry bag and tip.

6. Allow outlines to fully dry before flooding.

7. Practice makes perfect.

July 1, 2010

Jam Sandwich Cutout Cookies


With the Fourth of July holiday just days away, you might be looking for a cookie that is festive, delicious, and easy to prepare. Well, two out of three ain't bad. I made these Jam Sandwich Cutout Cookies last week for the first time. These bites of buttery sugar cookies are star shaped and laced with a thin layer of jam. They were a huge hit at Mike's family's second annual BBQ and fireworks watching extravaganza in Point Lookout, New York.

I should tell you something before you begin. These are extremely labor intensive. There. Don't say I didn't warn you. The result is well worth the time and effort. Mike's sister called them "outrageous."

The multi-step process includes making the dough, refrigerating it for 3 hours. Rolling the dough and refrigerating for 1 hour. Spreading the jam on dough and refrigerating for 1 hour. Cutting out the cookies and refrigerating the cookies another 30 minutes before baking. That's a total of 5 1/2 hours of refrigeration time! I know it's not "active time" but it still makes for a long process. I whipped up a batch of red velvet cupcakes in between while I waited patiently each time the dough chilled.

I made the rookie mistake of not reading the whole recipe before I started and ended finishing up at almost midnight. I won't make that mistake again. Ever.

To make this process even more challenging, I made these in our small city apartment where I have exactly 18 inches of counter space to roll the dough if I move the coffee maker out of the way.

Baker's note: Let the dough soften a bit before cutting the stars. This will make cutting the cookies easier to do and the jam will not ooze out as much. Dip the cutter edges in flour if the dough becomes sticky. Try cutting other shapes as well. Next time I will try a round cutter with a scalloped edge.

I found this recipe on Martha's website. She calls them Red, White, and Blue Stars. I prefer to call them Jam Sandwich Cutout Cookies since that's more descriptive. You could really cut them into any shape at all or simply cut them into bite-sized bars before baking.

I recommend making the dough a day or two ahead of time to make the process seem shorter (even though it won't actually be).

I also recommend baking as many of the scraps as you can. The jam oozes out the sides of dough scraps and after baking, made a deliciously crispy and sweet cookie.

Jam Sandwich Cutout Cookies

Yield: about 40 cookies (depending on size)

5 cups cake flour (not self-rising or all purpose)
plus more flour for rolling
2 teaspoons baking powder
1 1/2 teaspoons salt
3 sticks unsalted butter, softened
1 1/2 cups granulated sugar
4 large egg yolks
1 tablespoon pure vanilla extract
2 tablespoons heavy cream, plus more for brushing
3/4 cup raspberry jam
3/4 cup blueberry jam
2 tablespoons sanding sugar

Sift flour, baking powder, and salt into a large bowl.

Cream butter and granulated sugar with a mixed on medium speed until light and fluffy. Beat in egg yolks and vanilla until well combined. Add flour mixture in three additions, alternating with cream and beating well after each addition. Shape dough into four disks, wrap each in plastic, and refrigerate for at lease 3 hours (or up to 3 days).

On floured parchment, roll 1 disk of dough into a 1/8 thick rectangle (mine ended up as an oval despite my best efforts to roll a rectangle). Repeat with remaining disks. Stack sheets of dough and parchment on a cookie sheet, and refrigerate for 1 hour or freeze for 30 minutes.

Spread the raspberry jam on 1 sheet of dough, blueberry jam on the other. Top each with a plain sheet of dough and refrigerate for 1 hour or freeze for 30 minutes. I used a jar of my homemade raspberry jam which is so sweet and delicious.

Cut out cookies using a 2 1/2 inch star-shaped cutter, and space 1 inch apart on parchment-lined baking sheets. Brush with cream, and sprinkle with sanding sugar. I used Demerara sugar. Refrigerate for 30 minutes or freeze for 15 minutes.

Heat oven to 350 degrees.

Bake, rotating sheets halfway through, until golden, 16 - 20 minutes. Transfer cookies to wire racks and let cool completely. Bake extra dough scraps.


April 6, 2010

Easter Cutouts


Easter was only a few days ago and my blood sugar levels are returning to normal after gorging on peeps, jelly beans, chocolate cream pie, and sugar cutout cookies of bunnies, chicks, and bugs. Yes, bugs.

I confess that I didn't actually bake any cookies this week so I'm resorting to a little help from my sister-in-law who is a fan of the blog (Hi Tammy!) and who has made many of the cookies found here. Tammy arrived on Easter Sunday with a gorgeous array of cutout cookies iced with a wonderful looking sparkly icing in supercharged colors. After a few questions I found out that the cookie cutouts are from Martha Stewart's bug collection and the icing is sparkle gel from Wilton and comes in tubes.


I love the look of the brightly colored chicks, carrots, dragonflys and ladybugs. The cookie recipe is from Martha Stewart which always makes a deliciously buttery cookie.

As long as I'm sharing, here are the other dessert choices from Easter Sunday. My mom makes the best, tastiest pies on the face of the earth and we always have at least two to choose from. This year she made three amazing works of art.

Chocolate Cream Pie


Key Lime Pie


Lemon Meringue

March 16, 2010

St. Patrick's Day Cutouts


Tomorrow is St. Patrick's Day! The day the Irish and the pseudo Irish watch a parade and then hit the bars. I suspect there will be many people calling in sick on Thursday.

Over the weekend I made these cutout cookies to celebrate. I'm bringing them into work tomorrow and sharing with my co-workers. We've all be working hard lately and they deserve a little treat.

The cookie is a basic sugar cookie with royal icing. Click here for the previously posted recipes from the Penguin cookies I made a few months ago.

I unscrewed the green cap from the food coloring and put a drop into the mixing bowl only to find out the container was mislabeled and I had just made light blue icing! Luckily, I remembered that blue and yellow make green. With a few drops of yellow and a splash of creme de menthe, I remedied the situation and had a nice light green icing. Whew! That was close. My co-workers will never know that I almost gave them blue shamrocks.

Happy St. Patrick's Day!

February 9, 2010

Chocolate Dipped Shortbread Cookies


Valentine's Day is just a few days away and many of you are probably fretting over whether to buy flowers, chocolates or fine jewelry to celebrate this made-up holiday to fill the retail void between Christmas and Easter.

Ben Bernanke would probably not like me for saying this. But this year, why don't you just buy a card and make a nice home-cooked meal complete with a selection of home baked cookies? Skip trying to jump-start this dreadful economy and save some money for something important, like your cable bill.

I decided to make classic shortbread cookies to celebrate Valentine's Day. They're decadent and extra delicious when dipped in dark chocolate. I used Green & Black's organic dark chocolate with 85% cocoa content. The package reads "our darkest chocolate made with fine Trinitario cocoa beans." I'm not sure what a Trinitario cocoa bean is, but it sure sounds delicious. After dipping a bunch of cookies in chocolate I decided to channel my inner Jackson Pollock and drip chocolate as if I were creating a museum quality masterpiece.

This recipe is very easy to make. The most time-consuming part of making the cookies is chilling the dough before you roll it and again once the cookies are cut out.

Chocolate Dipped Shortbread Cookies

1 cup unsalted butter (2 sticks)
3/4 sifted confectioners sugar
1 t vanilla extract
2 cups sifted all-purpose flour
1/2 t salt
3 ounces semisweet or bittersweet chocolate, finely chopped
1 t canola oil or vegetable shortening

In the bowl of a mixer cream butter, sugar and vanilla until combined. On slow speed, beat in flour and salt until combined. Split dough in two pieces and wrap each tightly in plastic wrap and chill until firm (2 hours or overnight).

On a lightly floured surface, roll out the dough to a 1/8 inch thickness. Use heart-shaped cookie cutter to cut out shapes. Transfer cookies to an ungreased baking sheet. Chill for 30 minutes.

Heat oven to 300 degrees with rack in center of oven. Bake until just beginning to brown around the edges, around 16 minutes. Check after 10 minutes since baking time varies due to thickness of cookies.

Let rest on pan for 1 or 2 minutes before removing cookies to a wire rack. Cool completely.

Melt chocolate in a heat proof bowl over simmering water. A double boiler works best. Stir in the oil. When chocolate has cooled slightly, dip 1/3 to 1/2 of each cookie into the chocolate. Transfer cookies to wax paper or parchment and freeze for 10 minutes until chocolate hardens.

Cookie Press Review

I like everything about these cookies. They look festive without being gaudy, are easy to make, and even easier to eat. The bittersweet chocolate really makes this cookie a standout. Share them with your sweetheart and guarantee yourself a Happy Valentine's Day!

Cookie press rating: 4 cookies (out of five)

January 24, 2010

March of the Penguins


Martha Stewart and I go way back. I send her money and she sends me magazines. It's a dysfunctional relationship that makes me feel totally inadequate. Martha's homes are beautifully decorated and she never burns anything except maybe trimmings from her garden. In short, Martha's perfect. That's why when I received my subscription renewal gift I was pleasantly surprised (and secretly vindicated) when Martha had screwed up. I was supposed to receive a snowflake cookie cutter which would enable me to create fabulous snowflake cookies each delicately and painstakingly iced and decorated. Instead I received a penguin cookie cutter with instructions on how to make penguin cookies. As I about to toss the box in the trash, I noticed a sticker on the side with an apology note stating that the snowflake cookie cutter was no longer available. Damn, she even had the forethought to apologize for running out of a free gift. She is perfect after all.

I looked at the tiny picture of the decorated penguin cookies and thought, "hey, I can do this." The sugar cookie recipe is pretty basic and easy to make. The key is in the decoration.

Sugar Cookies

4 cups sifted all-purpose flour
1/2 t salt
1 t baking powder
1 cup (2 sticks) unsalted butter
2 cups sugar
2 eggs
2 t vanilla extract

Sift flour, salt, and baking powder together in a bowl. Set aside.
Cream butter and sugar in the bowl of an electric mixer fitted with a paddle attachment until light and fluffy (about 3 minutes). Beat in the eggs and vanilla.

Add flour mixture, mix on low until thoroughly combined. Wrap dough in plastic wrap, separating into two equal size pieces and chill for at least 30 minutes.

Heat oven to 325 degrees. Roll dough on lightly floured surface to thickness of 1/8th inch. Using cookie cutter, cut into desired shapes. Transfer to ungreased baking sheets, refrigerate until firm, 15 minutes. Bake 8 to 10 minutes until edges brown slightly. Cool on wire racks. Decorate as desired.

Royal Icing
2 large egg whites
1 pound confectioners' sugar
food coloring and/or sanding sugar

Beat egg whites, sugar, and 2 t water on low speed for 10 minutes. For thicker icing continue to beat 2 or 3 minutes more. Transfer to smaller bowls and add food coloring as desired. If icing is too thick, add a drop or two of water to thin.

I decided to stick with standard penguin colors, black and white. I saw March of the Penguins and know they live a difficult life. Decorating them in bright colors just didn't seem right. I cheated a bit and bought a tube of black icing for creating the penguin eyes.

I filled a plastic sandwich bag with icing and cut a tiny hole in one corner of the bag. Voila, an instant disposable pastry icing bag. The royal icing piped on nicely and didn't run all over the place. I had gotten the thickness just right. I sprinkled some with black sanding sugar, some with white sanding sugar and some I just iced the whole cookie white. I then started to get creative by adding a bow tie, tuxedo buttons, and small flippers to complete the cookies. I propped them up using an empty egg carton flipped over and dusted with confectioners' sugar.

My cookies only vaguely resembled Martha's professionally decorated and photographed cookies but I didn't care. These were my own interpretation and I think they turned out rather well.